Flat Grinding Rundown of a Tyrant Bolo.
Here's a quick overview of how I do a flat grind on a very big blade. I'd like to add that I'm not very naturally talented at grinding and am probably not the best person to learn from. I'm currently working towards getting bevels rough milled for perfect consistency and precision. From there, I can finish by hand with much greater accuracy. The tolerances I want to achieve are difficult to do by hand and requires years of practice, trial and error.
So here goes.
The blade pictured is the Tyrant Bolo. Its a massive blade and will be a challenge to grind. Its a 17.5in blade and is 3 inches wide at the sweet spot. Starting weight is just over 42 ounces. The larger and heavier a blade is, the more difficult it is to grind. This one is made from 52100 and is going to be hard ground. For low alloy steels like 52100, I prefer to hard grind because I don't like finishing the blade twice. If you grind a blade before heat treat, the bevels must be ground and finished to at least 120 grit to avoid stress risers during quenching. If you were to just hog off steel with a 50 grit belt and sent it to HT, the phase change the steel undergoes in the quench will almost certainly cause cracks to propagate along the 50 grit marks. Additionally, you cannot grind an oil hardening blade to its finished thickness before HT because, the edge will be too thin and will warp during the quench.
With an air hardening steel like 3V, you can completely finish the blade before HT. Most air hardening steels can be taken down to .020-.10 edge thickness before heat treat which is the finished thickness for most blades.
With that in mind here is the grinding process.
First, I start by painting the edge of the blade with dykem layout fluid. This is a very necessary process and I never grind a knife without it. Some guys will paint the entire blade to help them visualize grinds but typically just stick to the edge.
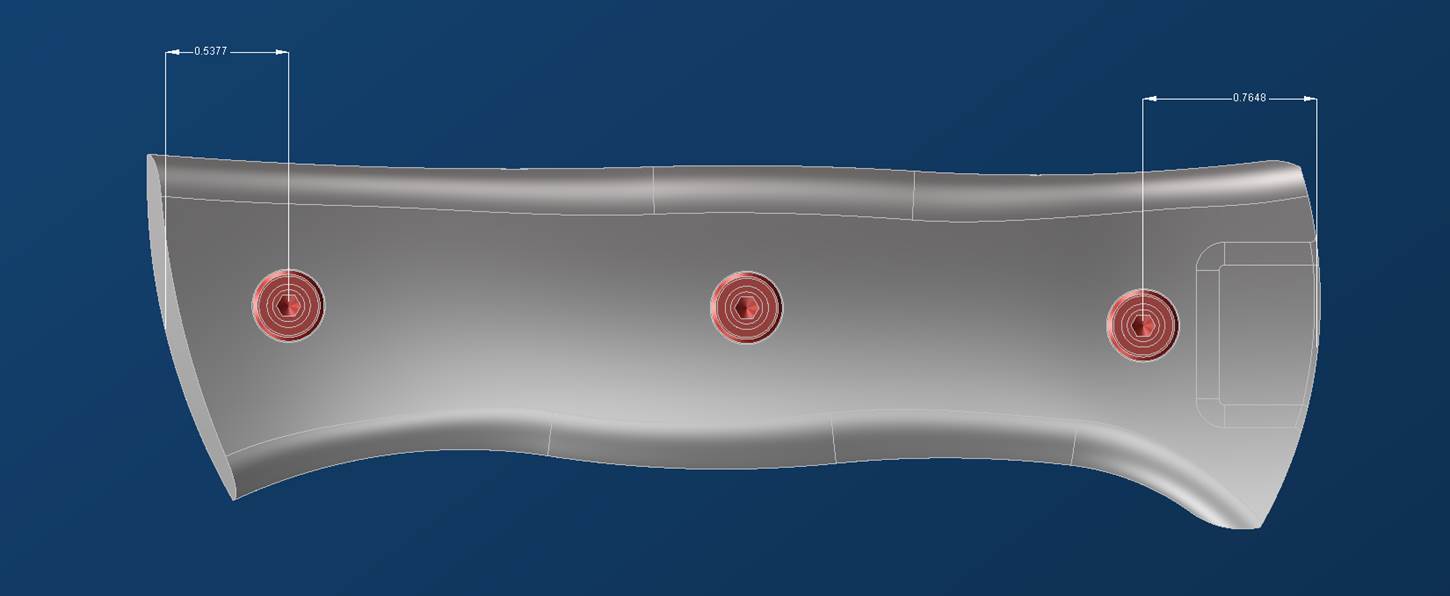
Next, using this nifty tool, I scribe the center lines. If you are going to make knives, this is one of the most important tools you can have. Getting the edge centered is of the utmost importance if you want even bevels.
To use this tool, just decide the edge thickness you want to stop at, deduct it from the total stock thickness and divide by two. I've crudely illustrated this process on the whiteboard. You may also want to keep in mind the actual thickness of the scribe line itself, depending on whether you want to leave the line intact or if you want to grind the line away. The line itself is about .003 thick. I like to grind the line away to I subtract the line thickness. For this Bolo made from .1875 thick steel, I need to adjust the scribe to .079. Then I take away .003 for a finished line height of .076. Taking into account the thickness of the line is not that important but it is something I like to do.
To scribe, pick a perfectly flat, square surface. You really want to use a granite precision block but I don't have one so for now my bandsaw table does the trick. Drag the scribe along the edge of the blade and then flip over and repeat. Voila, you have a perfectly centered edge.
Now its time to start hogging off material. I begin by using a 10in wheel to grind the edge down to the scribe mark. For this I use an old 50grit belt. The sharp edge on the blank can knock all of the grit off of a new belt. I quench every pass and keep the blade cool. Here is a comparison between an old belt and a new belt. I use Ceramic Cubitron belts from 3M. They work very well and last a long time.
On the wheel you will establish your initial bevel as well as the plunges. You have to get this step right or else your blade will be ruined. No pressure.
Looks good so far.
After the meat on the edge has been hogged off its time to go to the flat platen and begin the flat grind. For flat grinding I use a fresh 50 grit belt. Sometimes I will use a 36 grit if it really thick stock.
For the flat grind, I just take the blade to the grinder and begin slowly taking off steel each pass and making the grind higher.
This is where the jankiness in your grinding technique will come out. All of us have differences and imbalances between our right and left sides and they will manifest in unevenness in your grinding. The goal is to pull the blade straight across the platten with consistent pressure and a consistent angle. Much easier said than done, especially on a blade this size. This is the part of grinding that takes years and years of practice and hundreds of blades to get right. I'm still not there and probably never will be.
Bevel coming along
After the bevel is established with the 50 grit belt and you get it to the correct height its time to start the finishing process. I jump to either an 80 grit belt or a 120 grit belt next. For this blade I went with the 80 grit just to make sure there are no lingering 50 grit scratches. The last thing you want it to have your bevel finished out to 280 grit and find a 50 grit scratch lurking under a nice finish.
For belt jumps you never want to do more than double the grit, lest you risk leaving the lower grit scratches visible. My typical belt progression for 52100 is 50, 120, 180, 280, 360. For a machete, if all is going well I can sometimes leave out the 280 and go straight to the 360 finish.
For grits 50-120 I use ceramic cubitron belts from 3M. For 180-360 I use Trizact finishing belts. They have a cool structured surface and leave a nice finish.
On this blade I'm adding in some extra steps to make sure the finish is consistent. One of these steps is the scotchbrite belt. These are specialized finishing belts and they are a godsend. They help blend together grit marks and leave a nice even finish.
Here is a picture of the blade after being finished to 180 grit and hit with the scotchbrite belt. From here, the blade will get a long soak in some acid to remove the decarb on the flats and then I will finish the bevels with the 280 grit and 360 grit belts.


")