Crosscut Saw Thread

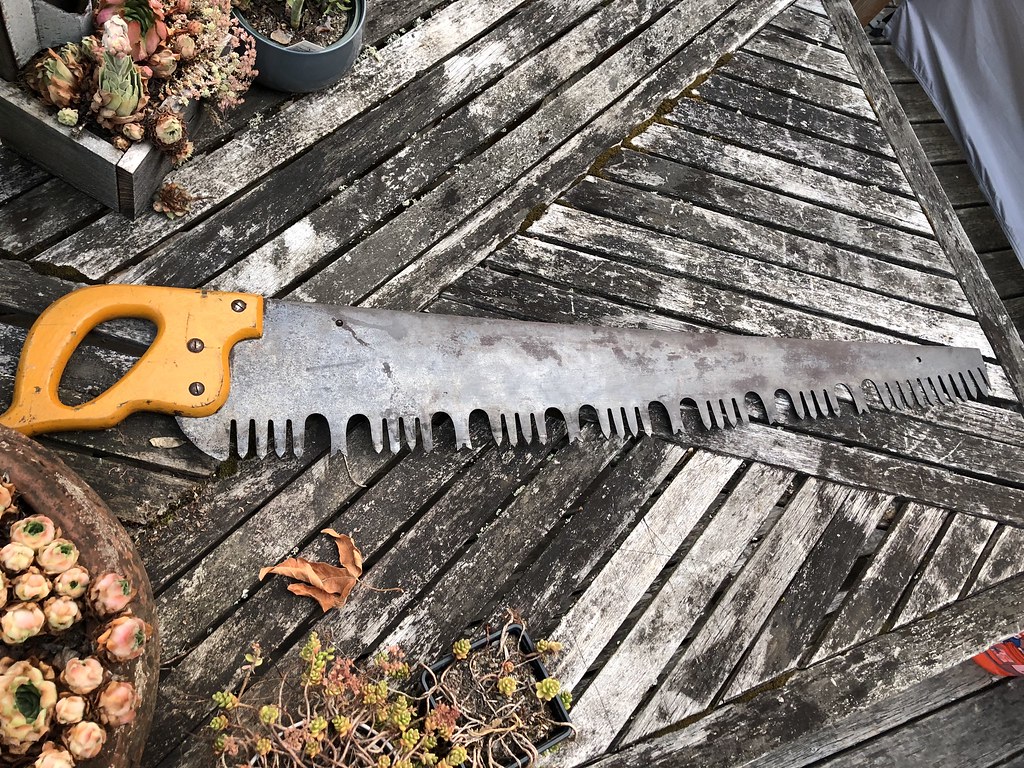
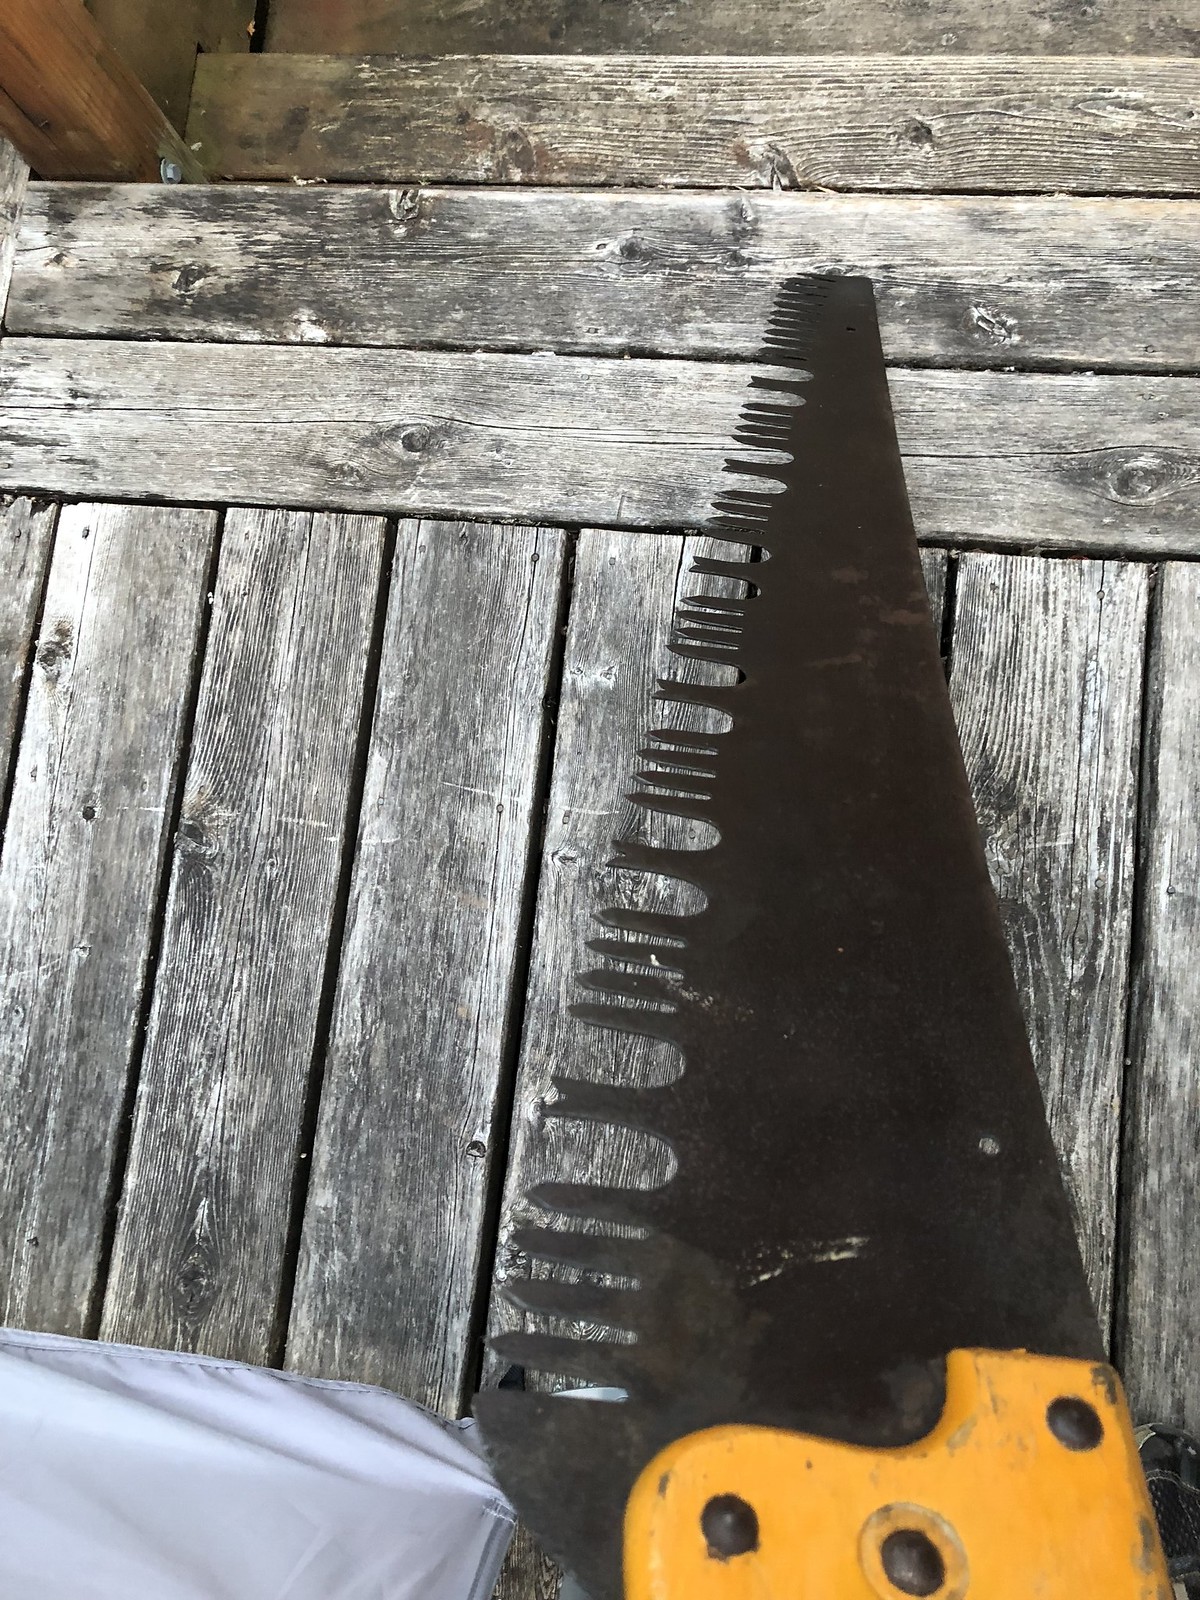
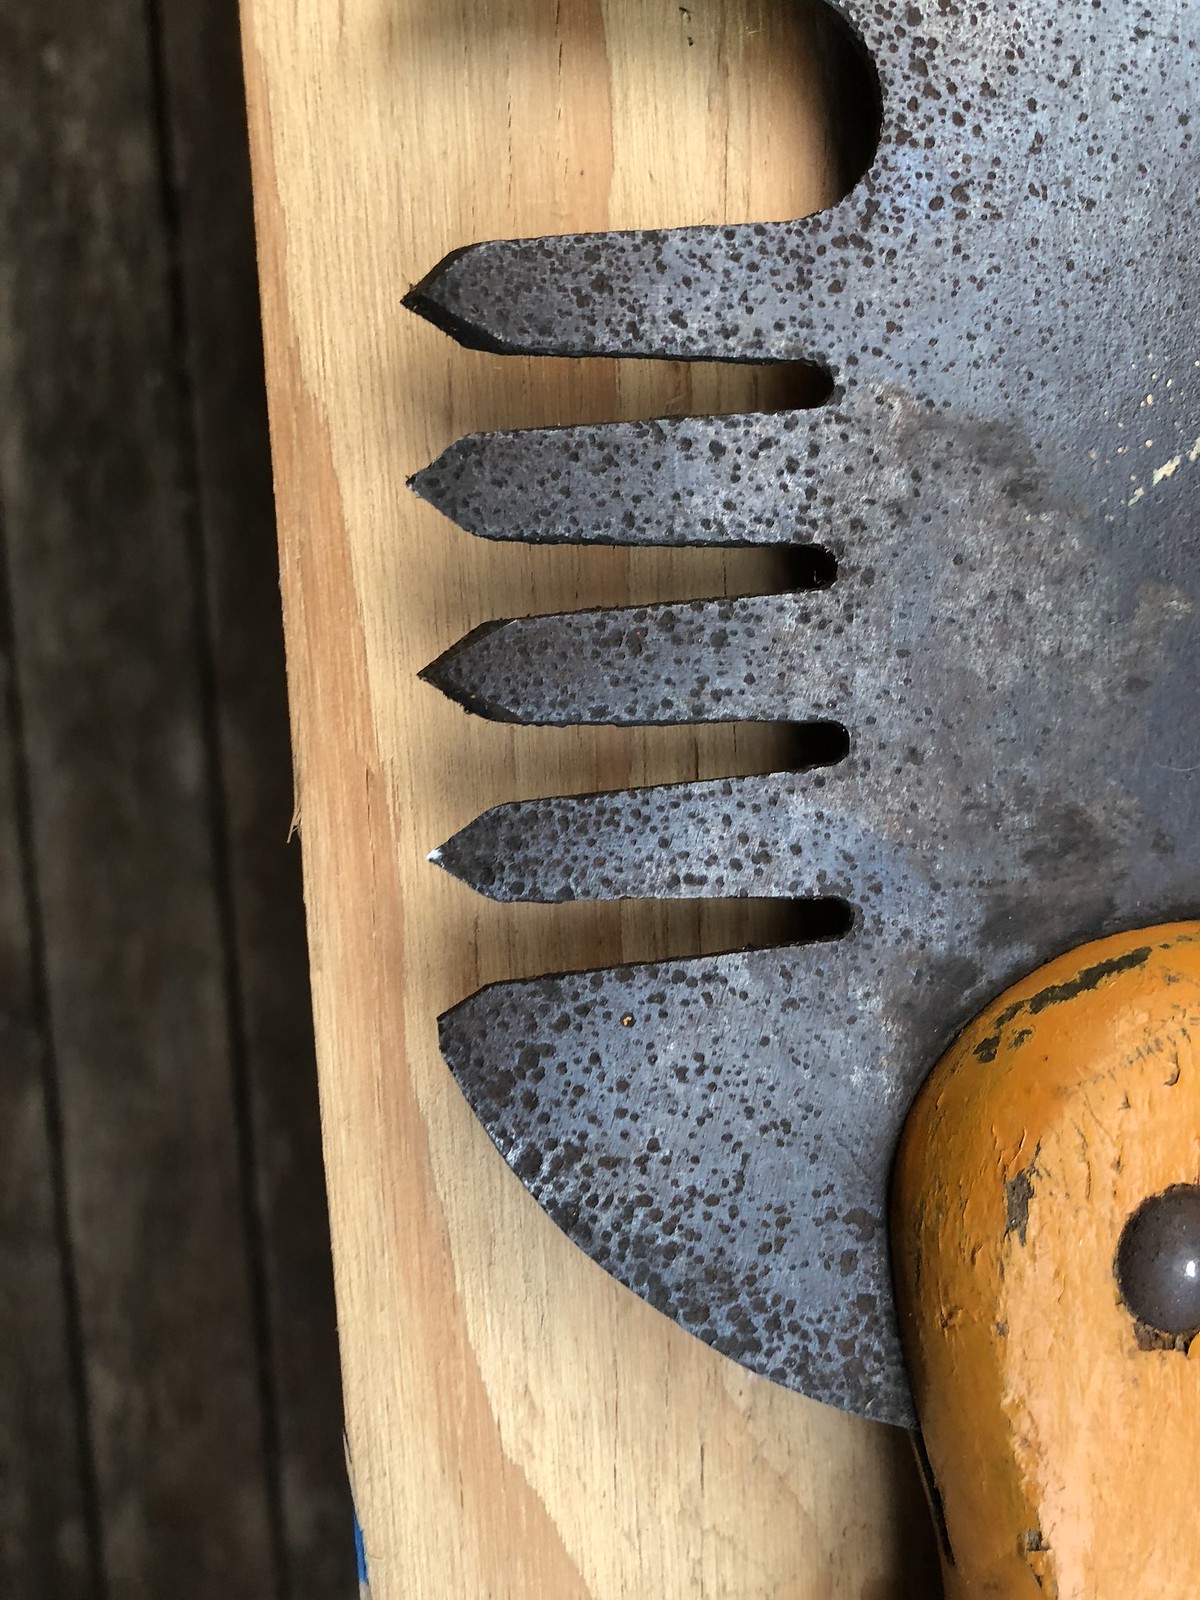
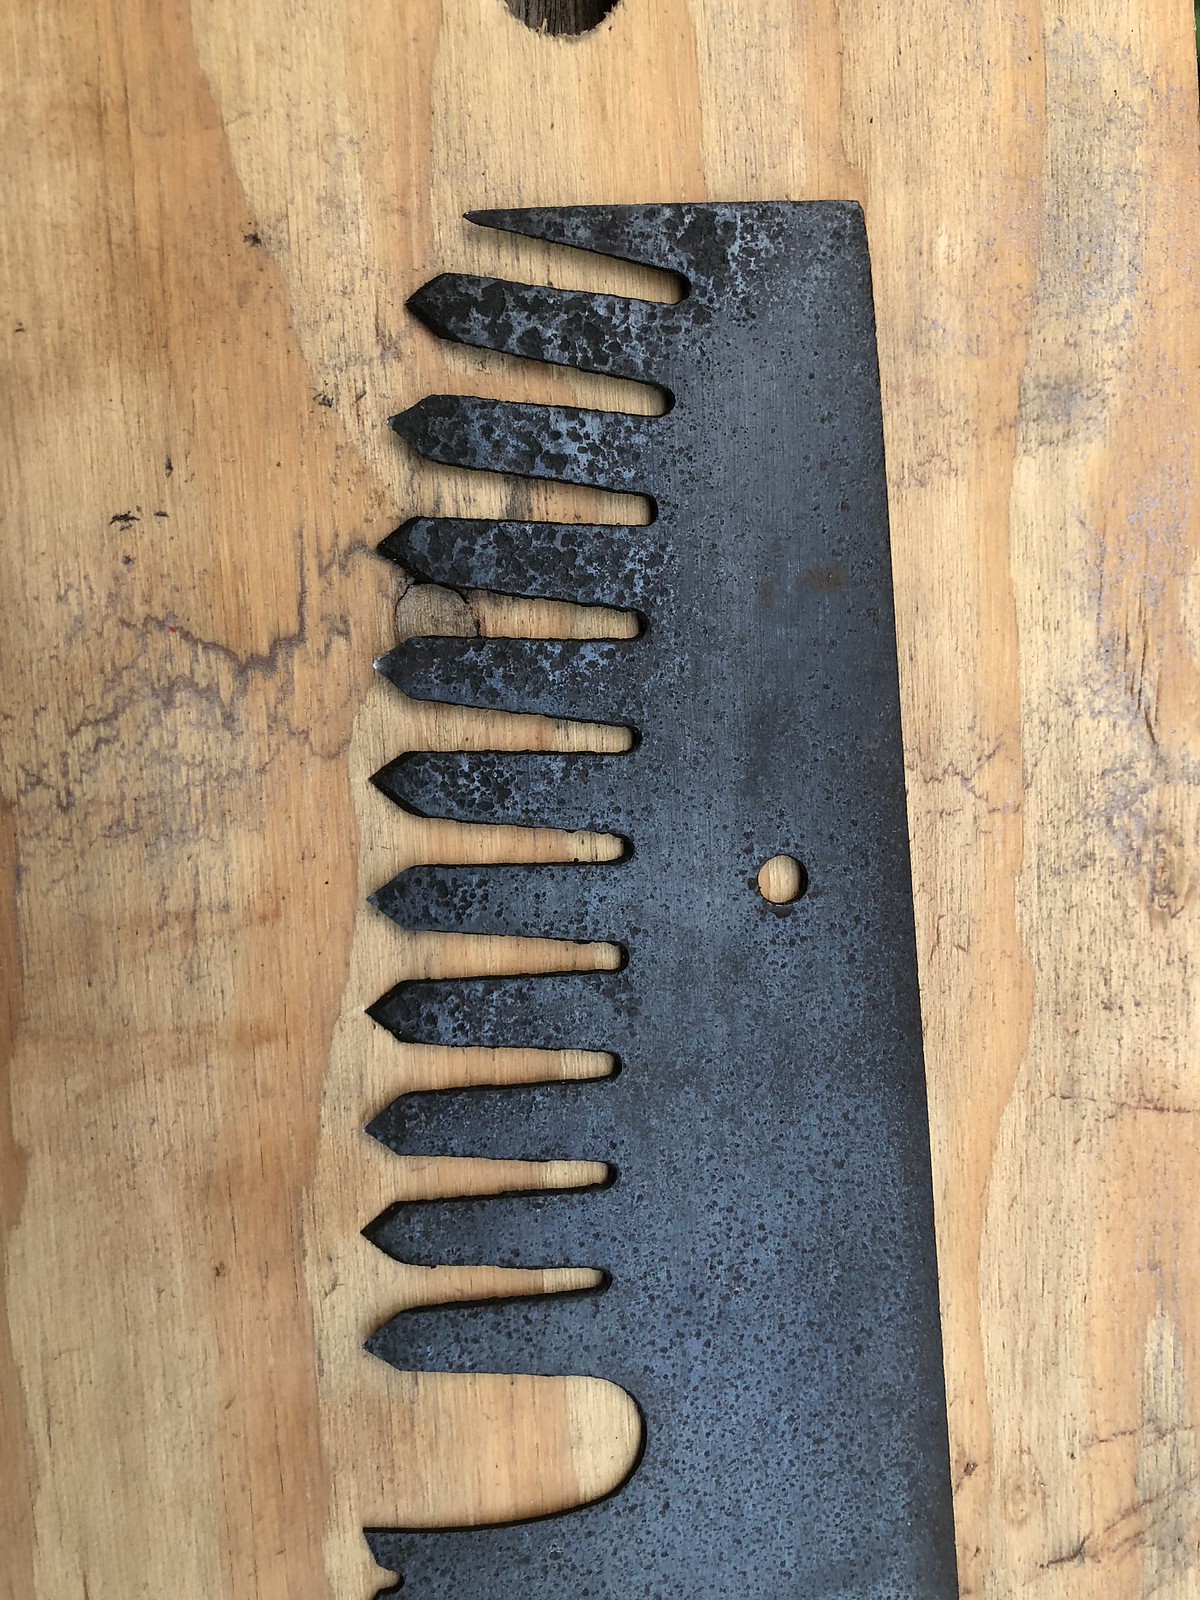
Don't give a 2nd thought to that. You're going to have reset the saw anyway. Clean/file the back of those cutters good so you can make a good point. When you're setting whether you have to change a particular tooth by 1/1000 or 12/1000 makes little difference.

Thank you, Square_peg.

I have some fresh files for just this sort of thing but I am wondering,

1. Should I lay it flat on my anvil and push stoke the length of the saw, across the cutters as demonstrated in the continued video you shared earlier?

2. Do I flatten the set out first or does the file only make contact with those teeth inherently set towards me, then flip it over and do the same to the other side (as the previously-opposing cutters will be the ones set toward me to meet the file)

Like I mentioned, what I lack in experience, is made up in questions lol.

I appreciate all the help from you guys who have done this a while - and those who haven’t, for that matter.
 
uvN8Ppl.jpg

the camera wouldnt focus on the spine, it was too thin

Damn. I’ve been looking at this and don’t know what to say other than your poor saw looks like what my feeler gauges look like after a couple of beers...

Did you have a flat surface? What type of hammer were you using? And did you knock too far to the edges of where the original rise or dip was maybe?
this was just as i started doing this stuff so all i knew how to do was remove the rust. i had no idea.
i used my ball peen and a Rail road track and of course, it wasnt level so there's a bunch of crescent dents.
I regret all of this, and lost the hardware
 
I’m sure someone could fix it but I personally am just at the “pre-hammer” stage of saws. I already am prepared to fix my own work. The worse kind of pissed-off is done by our own hands.

If it is not salvageable, you could be the only guy with a classic Disston No.76 “Slim Jim” or cabinet scrapers. Would a straight section work as a modified flat gauge? Might take some precision work to get it square. Smaller than this of course but the same idea:
54-3_sml.jpg


Just thinking positive.:thumbsup:
I was thinking about making a little joinery back saw
 
I have some fresh files for just this sort of thing but I am wondering,

1. Should I lay it flat on my anvil and push stoke the length of the saw, across the cutters as demonstrated in the continued video you shared earlier?

2. Do I flatten the set out first or does the file only make contact with those teeth inherently set towards me, then flip it over and do the same to the other side (as the previously-opposing cutters will be the ones set toward me to meet the file)

Like I mentioned, what I lack in experience, is made up in questions lol.

You just want the pits gone from the very tip so you can make a solid point. I'd lay it down flat and file straight up each tooth to make a good clean back of the point. Later setting will make up for whatever you've removed.
 
Thank you, Square_peg.

I have some fresh files for just this sort of thing but I am wondering,

1. Should I lay it flat on my anvil and push stoke the length of the saw, across the cutters as demonstrated in the continued video you shared earlier?

2. Do I flatten the set out first or does the file only make contact with those teeth inherently set towards me, then flip it over and do the same to the other side (as the previously-opposing cutters will be the ones set toward me to meet the file)

Like I mentioned, what I lack in experience, is made up in questions lol.

I appreciate all the help from you guys who have done this a while - and those who haven’t, for that matter.

The best reference I know of for restoring old pitted saws is this video http://www.bchw.org/Tech tips/sharpening/Saw Reconditioning.htm
Jim goes thru all of the steps on an old saw......
Agent H - yours isn't that bad!
 
I believe you’re right. One is missing though. Those “spacers” are acrylic or maybe pieces of cut pane glass. They where glued/exopied on there. One side is solid but the other has dried adhesive of some sort.

Since it’s important those surfaces are the same on either side of the pin, I was curious for ideas on whether or not the best route would be to completely remove all traces of them for a clean slate and rebuild each side.

And if I go that route, is there a desired thickness and/or materials members here might envision using? Or is it simply most important that they are both exactly the same thickness (or as close as I can get) to either side of the screw?

The "spacers" on the flanges of early Morin gauges were glass...... which provided a smooth, flat surface to rest on the cutter teeth. Later models use steel plates for flanges, and do not need the glass. The best option is to pick up a later model gauge!
 
Repairing this one is an option but we are talking 1000ths of an inch to be accurate.
If you see decent ones floating around out there, please let me know.;)
 
Repairing this one is an option but we are talking 1000ths of an inch to be accurate.
If you see decent ones floating around out there, please let me know.;)
Hard to beat an Anderson raker gauge, though pricey and you'll still need a pin gauge if swaging (Atkins #15 is my preference for pin setting)

Ebay is the place to find this stuff unless you live in the Pacific northwest, where they are more common at flea markets.
 
Hard to beat an Anderson raker gauge, though pricey and you'll still need a pin gauge if swaging (Atkins #15 is my preference for pin setting)

Ebay is the place to find this stuff unless you live in the Pacific northwest, where they are more common at flea markets.

I do live in the PNW. I have only seen these a couple of times, usually missing pieces. I very much appreciate the links Trailtime. The Anderson has the angled plate so you can file them at that angle to depth and then you have more of a "finished" shape to swag them as opposed to coming off flat then having to reshape them even more to get into shape? The price on that is half the cost of fuel I would use hunting one down (rationalizing to self lol).

If I'm lucky enough to make it happen, a forum member here has offered to potentially help me in person to set them up right and maybe even a demo - there is nothing as valuable as hands on learning.

Trailtime - This one looks similar to one of those you posted? The shims under the plate are .022 if I can use a feeler gauge right...:

Morin.Gauge
by Agent Hierarchy


Morin.Gauge
by Agent Hierarchy


Morin.Gauge
by Agent Hierarchy
 
I do live in the PNW. I have only seen these a couple of times, usually missing pieces. I very much appreciate the links Trailtime. The Anderson has the angled plate so you can file them at that angle to depth and then you have more of a "finished" shape to swag them as opposed to coming off flat then having to reshape them even more to get into shape? The price on that is half the cost of fuel I would use hunting one down (rationalizing to self lol).

If I'm lucky enough to make it happen, a forum member here has offered to potentially help me in person to set them up right and maybe even a demo - there is nothing as valuable as hands on learning.

Trailtime - This one looks similar to one of those you posted? The shims under the plate are .022 if I can use a feeler gauge right...:

The angled plate on the Anderson is for a finer finished raker tip. You swage to the pin, stopping 0.002"-0.003" ABOVE your final raker height, then finish with the Anderson.

Your gauge looks similar to a Morin, perhaps an early version. The adjustable screw and thumbwheel for the pin needs careful calibration every time you change heights, whereas the Atkins #15 has little detents that sit against a spring for repeatable and accurate height changes.

This guy has a lot of tools for sale. He's higher than eBay but has an impressive selection. Search down to saws and saw tools:
http://www.jonzimmersantiquetools.com/index.html
 
v2LDHZ6.jpg

So here's that big saw from my last trip, I almost went to just 220 grit and sanded the plate but then i saw faint lettering and i'm glad i did.
 
looking into naval jelly for cleaning medallions, i'v heard it can cause hyper-oxidation on brass so i'm only testing it on one saw ATM but i will keep you posted on how it developes
 
Lookin' good, Phantom. Looks like a 1917-1940's one if'n I had to guess. I know where there's a couple of crosscut and rip saws like yours. The fellow who had them was a logger and is a hoarder. He's got axes, one and two man saws, hand saws, braces, sledges, and at least one log branding hammer. I'm working my way towards getting my grubby little mitts on 'em.
edit: Got 'em.:)
 
Last edited:
Lookin' good, Phantom. Looks like a 1917-1940's one if'n I had to guess. I know where there's a couple of crosscut and rip saws like yours. The fellow who had them was a logger and is a hoarder. He's got axes, one and two man saws, hand saws, braces, sledges, and at least one log branding hammer. I'm working my way towards getting my grubby little mitts on 'em.
the little no.12 is a 17-40, this guy has a 96-17 medallion, i know it's a little tough to see.. hope you can grab one of those saws!
 
Back
Top