• The BladeForums.com 2024 Traditional Knife is ready to order! See this thread for details: https://www.bladeforums.com/threads/bladeforums-2024-traditional-knife.2003187/
    Price is $300 ea (shipped within CONUS). Now open to the forums as a whole. If you live outside the US, I will contact you after your order for extra shipping charges. If there are customs issues? On you.

    User Name
    Serial number request

Review Using the RUIXIN PRO III knife sharpener

P Pricelessbrewing the 008 looks good on the pictures! I also saw new inexpensive spare parts for the ruixin sharpeners on AliX, amongst others:
snap1edjis.png

I am wondering if the metal ball is a steel ball, hence wear-resistant. Anyone knows?

Yes, that's a steel ball.
 
So is it a recommendable replacement part product with no real flaws in practice? I'd want to use it on the RUIXIN PRO III F fvdk
 
Thanks so much for the recommendation.

Any reason you've switched to the fast cutting compounds over the CN diamond polishing syringes?

I think I just need to decide on pro III with mods, or RX008 now.
 
So is it a recommendable replacement part product with no real flaws in practice? I'd want to use it on the RUIXIN PRO III F fvdk

I think it is definitively better than the standard pivot that comes with the Pro III but you might want to move the vertical arm further backwards (off the Ruixin itself) otherwise the block that the pivot is mounted on, limits the stone arm swing to the right.

Personally, I am not a fan of the Ruixin III model and I would rather invest in a better system.
 
P Pricelessbrewing Hmm, no real reason other than i was running out of CN diamond paste (syringes) and i have no need to rebuy the stuff anytime soon because i have lots of solid polishing compound to last a lifetime. So i use whatever i have plenty supply of in the household.

On a side note, it is interesting that solid polishing compound vs CN diamond polishing paste work the steel differently and also produce a different macro effect: After a succession of 2-3 solid polishing compounds the steel surface becomes hydrophobic, i.e. water-repellent; water forms big drops on the blade which then roll off it, cleanly. Whereas after a sequence of CN diamond polishing pastes the steel surface becomes (rather) hydrophilic; or at least it doesn't develop the same extent of hydrophobia imo. Never mind. I do prefer hydrophobic blade bevels though.

CN diamond paste is easier to apply in practice, on the PTS. The syringe contents gets consumed faster. And you never know which syringe you should start with, maybe the blue one (7micron)? And once you start with the blue syringe, do you really wanna go thru the entire succession, 7u, then 5u 3.5u 2.5u 1.5u 1.0u 0.5u and 0.25u omfg? That's tiring in the long run imo. Solid polishing compound is much faster cutting and a simple two-stage procedure after the RUBY3000 stone and you end up with a macro scratch-free bevel in standard mirror polish.

quickly the most relevant points pro's con's,

cheap CN diamond paste (syringes set):
+ very inexpensive stuff
+ easy to apply on a PTS
+ works highly effectively, very fast-cutting applied on a PTS with the Ruixin system
- long sequence of syringes, tiring over the long haul
- confusing which syringe to start wiv
- doesn't work applied on leather/on a leather strop
- works okay applied on wood for polishing but the syringes get consumed fast there
- it's tricky to get them to abrade anything, if applied on a microfibre cloth: one needs the perfect micron syringe to start with and also must not jump syringes, otherwise the paste would again not abrade anything.
- experienced users can get great results, e.g. for mirror polishing small metal objects. but one really needs some time and stamina to go through every syringe. beginners get the impression that the stuff doesn't work at all, believing that the diamonds stuff is too low-concentrated; they're wrong. i kinda believed the same thing and had the stuff lying around unused/unappreciated for a long time, trying all kinds of base materials, until the PTS showed me how fast cutting the stuff can be omg!

solid polishing compound:
- takes a bit more time to apply on a PTS .. if you don't want to damage the balsa holder; i keep pre-shaved flakes handy in mini containers so that i am ready to apply (=rub in) compound whenever i need it.
+ very inexpensive stuff, even the industrial pro grade stuff
+ works highly effectively, extremely fast-cutting applied on a PTS with the Ruixin system
+ works highly effectively applied on any other base material (wood, cloth, ceramics, leather) [side note: neither CN diamond paste nor solid polishing compound adhere well on leather because they're wax-based]
+ very simple fast efficient two-stage procedure. WHITE compound. then BLUE compound. and then you can enjoy watching AO2020 without having missed a federer set lol
+ clearly my preferred way to go. i like simple fast efficient. that's also why i generally don't use the Ruixin device anymore.

Currently i do have the Ruixin perma-setup for 1 particular knife only, my one and only EDC knife. I reground the blade bevel with the Ruixin a month ago and might use the PTS method for maintaining the edge from now on, instead of 204-freehanding and freehand stropping it. I had planned to post some photos of that permanent setup because the blade shape is peculiar and it's nothing one would ever think of sharpening on a guided sharpening system .. but i managed to setup/configure the Ruixin for this challenging task. It took hours for the configuration.

Many different sharpening tasks can be done to great satisfaction on the Ruixin, not only for the mid-sized folders (for which the device is 100% suitable). But it takes some time and efforts to make the device operational, getting the configuration perfect.
 
Personally, I am not a fan of the Ruixin III model and I would rather invest in a better system.
Thanks for the helpful assessment! I think i'll give that replacement part a pass, for various technical and other reasons. There may be some better alternatives on the market anyway, or in future.

Hmm i like the Ruixin III model (and get along very well with the fast-wearing pivot :poop:) but i hardly use it anymore. 29 out of 30 sharpening sessions are freehand by now. When i started the thread, my freehanding rate was 0 out of 30. Since then I resharpen all kinds of blades/edges, all freehand and with two (alternative) stones only!, either with the 204UF or the 302UF, depending on the blade shape/size. i like simple fast efficient. as said in the previous post ;)

BASICALLY IT WAS THE TIME-EFFORT INEFFICIENCY OF THE RUIXIN WHICH EVENTUALLY, AFTER 1.5 YEARS, DROVE ME INTO TRYING FREEHANDING. MY FIRST FREEHANDING ATTEMPT WAS ON THE RUIXIN120 STONE AND IT WAS AN IMMEDIATE SUCCESS. All my time with the Ruixin had set me up for success when i ventured into leaving the guided system behind.

Looking back, for me it was the right thing to do, getting into sharpening by "investing" into the whole ruixin thing first. The ruixin taught me so much about sharpening aspects and minute details that the transition to freehanding felt all natural. After the 1.5yrs of ruixining i really have had enough.

For 1 out of 30 sharpening sessions i still need the Ruixin, e.g. for a particular gardening tool where exact sharpening geometries are really desirable. Last month i managed to configure the device uniquely for convenient maintenance of my favorite EDC folder (i'll share photos of the setup in near future:thumbsup:), so i should use the ruixin a bit more again this year. The PTS method consumes the blade quite fast, so erh .. we'll see how the regular bevel maintenance goes. :rolleyes:
 
I am running out of the WHITE/BLUE-compound set and will rebuy it later this month. Costs less than 5EUR locally, very nice.

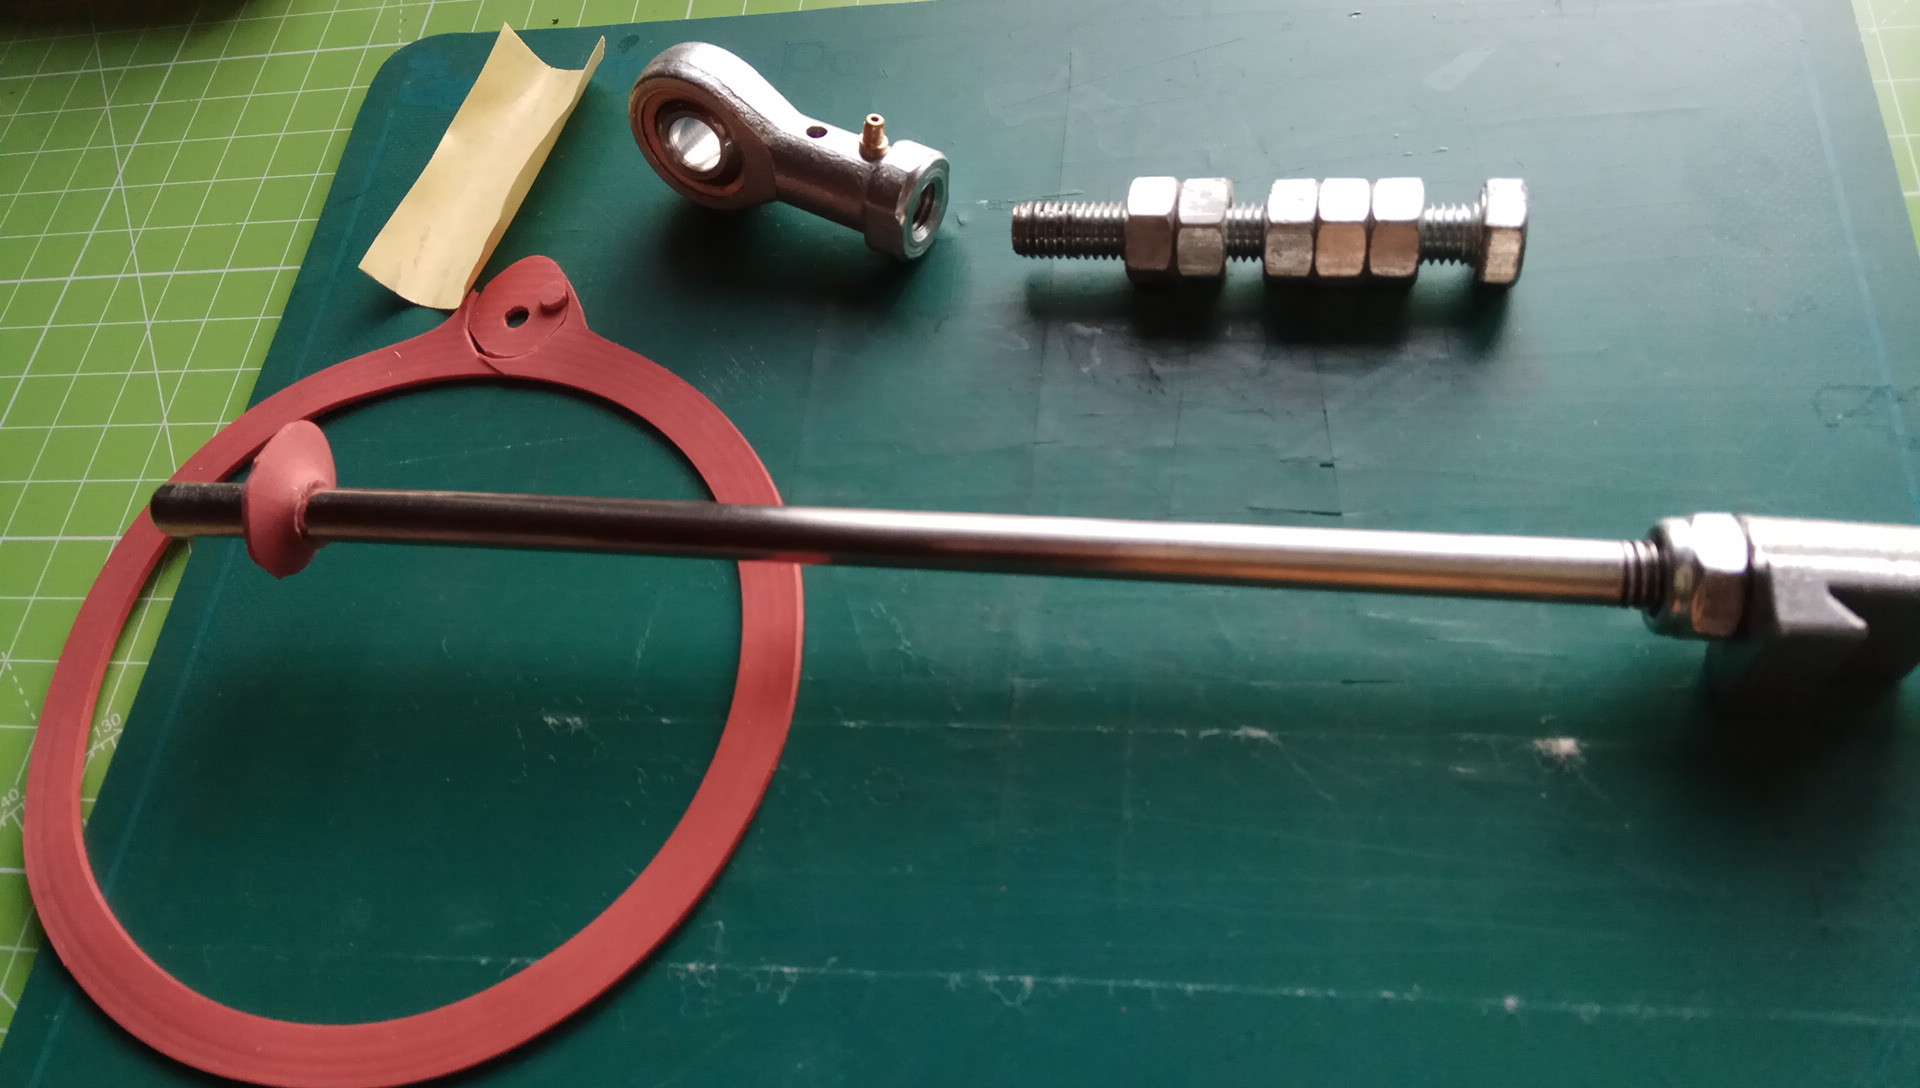
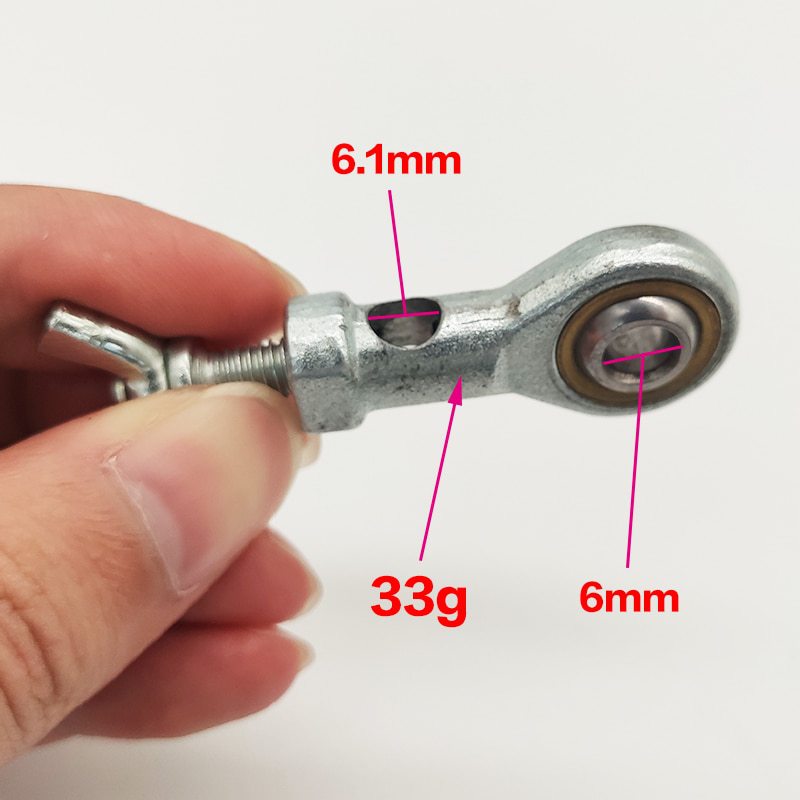
Despite all my freehanding, i still have use for my ruixin pro iii and always wanted an improved swivel head. Inspired by Buybest's video i ordered the "1pcs PHS8 M8 8mm hole 5mm to 14mm metric fish eye Rod Ends bearing female thread ball joint right hand" for 1.6$ shipped from alix which comes with a tiny hole at the top as you can see:
111pcj6h.jpg

I have no idea why the part manufacturer made that tiny hole but i am gonna use it as centering aid to bore a through hole of 7.5mm diameter, because the vertical ruixin rod is 7.10mm thick. The female threads are M8, which i confirmed with a geman screw, and from my measurements they are cut just(?) deep (long) enough that a 16mm long screw could tighten against the installed vertical ruixin rod. I ordered a M8x16mm wing nut today for the final configuration (1$ shipped from alix).

Note that the steel ball has a 8mm through hole, while the shown steel rod is only 7mm thick. No problem whatsoever, one can roll a small tube out of low-friction paper (e.g. the backing of carpet tape) and insert it in the ball. Interestingly, the paper roll stays in place when the sharpening rod is moved back and forth! The paper roll not only minimizes play but also reduces wear (abrasion) between the steel ball hole and steel rod. Inserting paper to reduce play is not an elegant, beautiful, commercial/professional solution but this workaround works great, and you shouldn't be concerned about the 1mm difference in diameters. (But otherwise, yes, 1mm play would be way too much, agreed!)

Also, some users might need "rod stoppers", 2pcs for the sharpening rod. My DIY solution works!, with a scalpel i cut a 4mm diameter hole in the lid (lip?) of a rubber jar gasket (rubber seal for a kitchen jar) and cut the ring out. This diy rubber ring sits tight on the 7mm thick steel rod! Stoppers made out of stainless steel would be nicer, sure (and heavier).

As soon as i've drilled the 7.5mm through hole, i'll post an update on the fitment/functioning of everything, stay tuned. We doht need to wait for my wing nut to arrive.
 
Last edited:
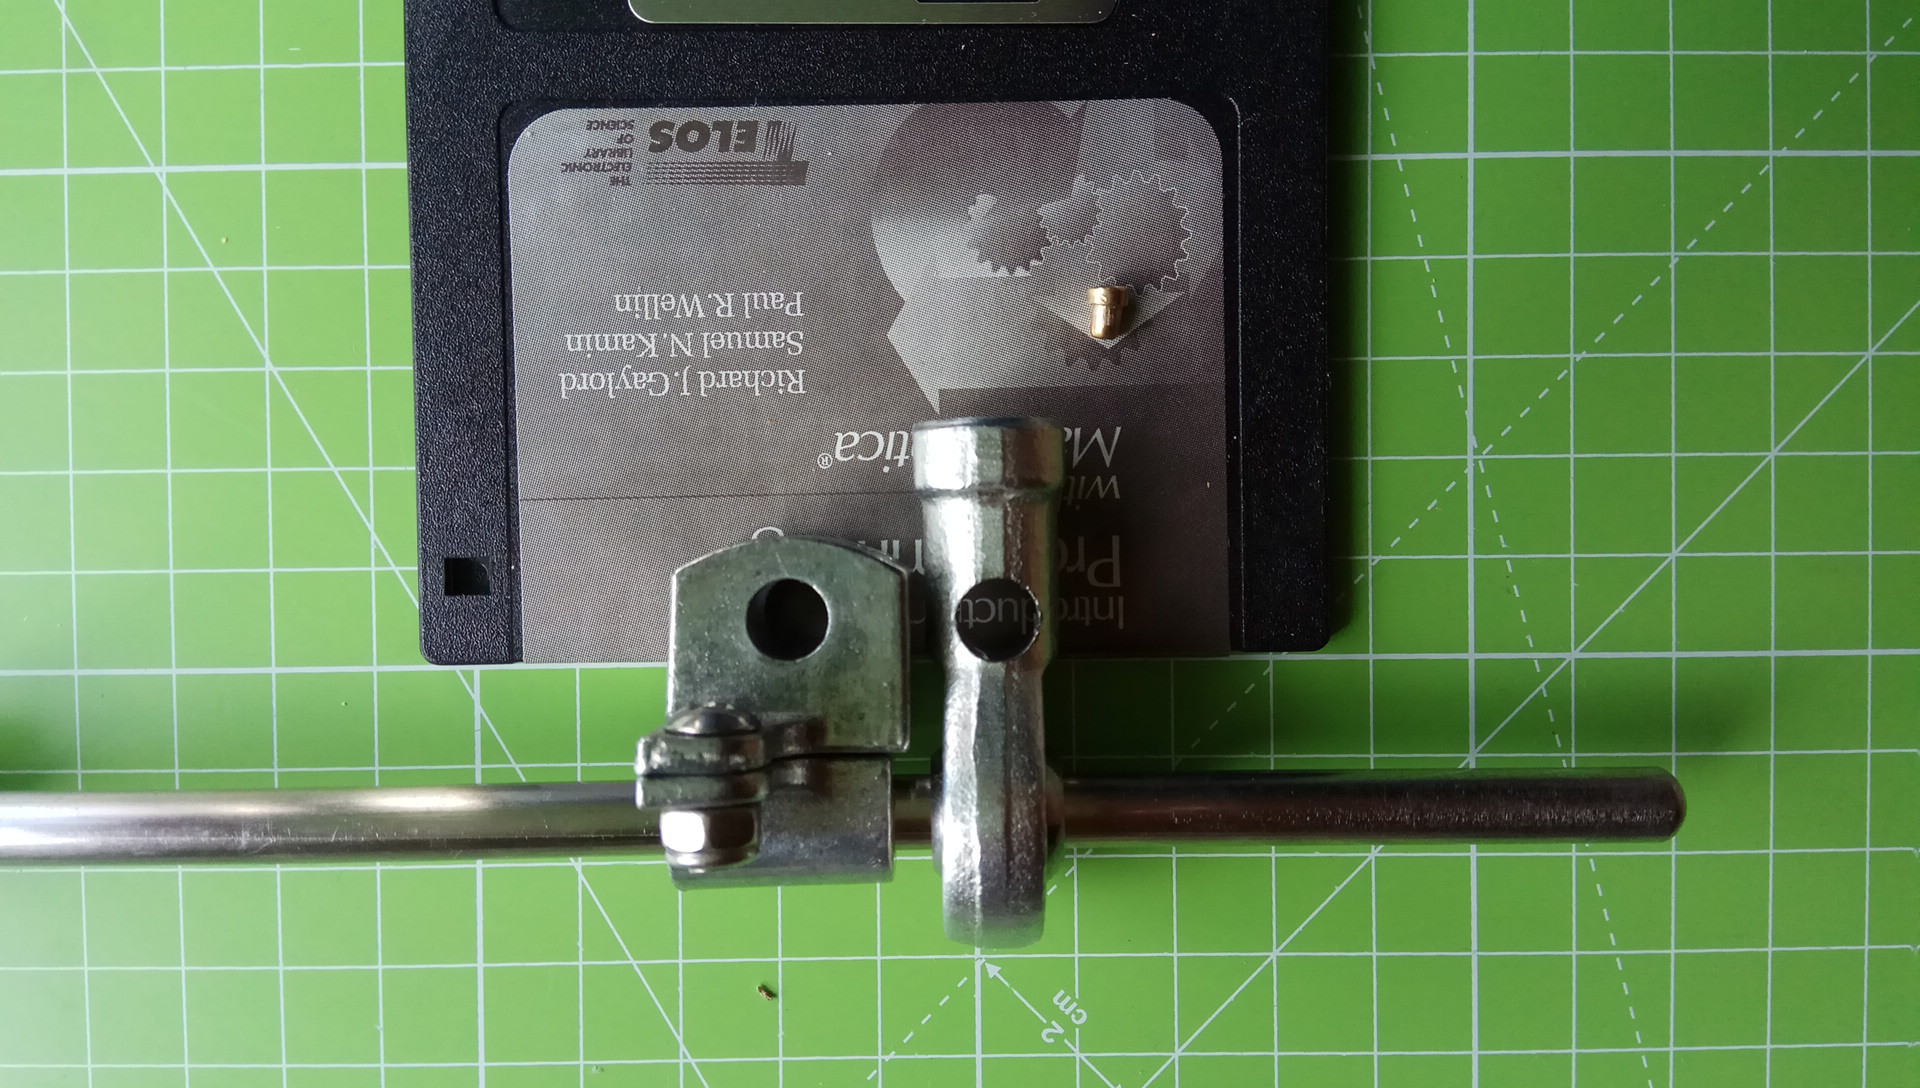
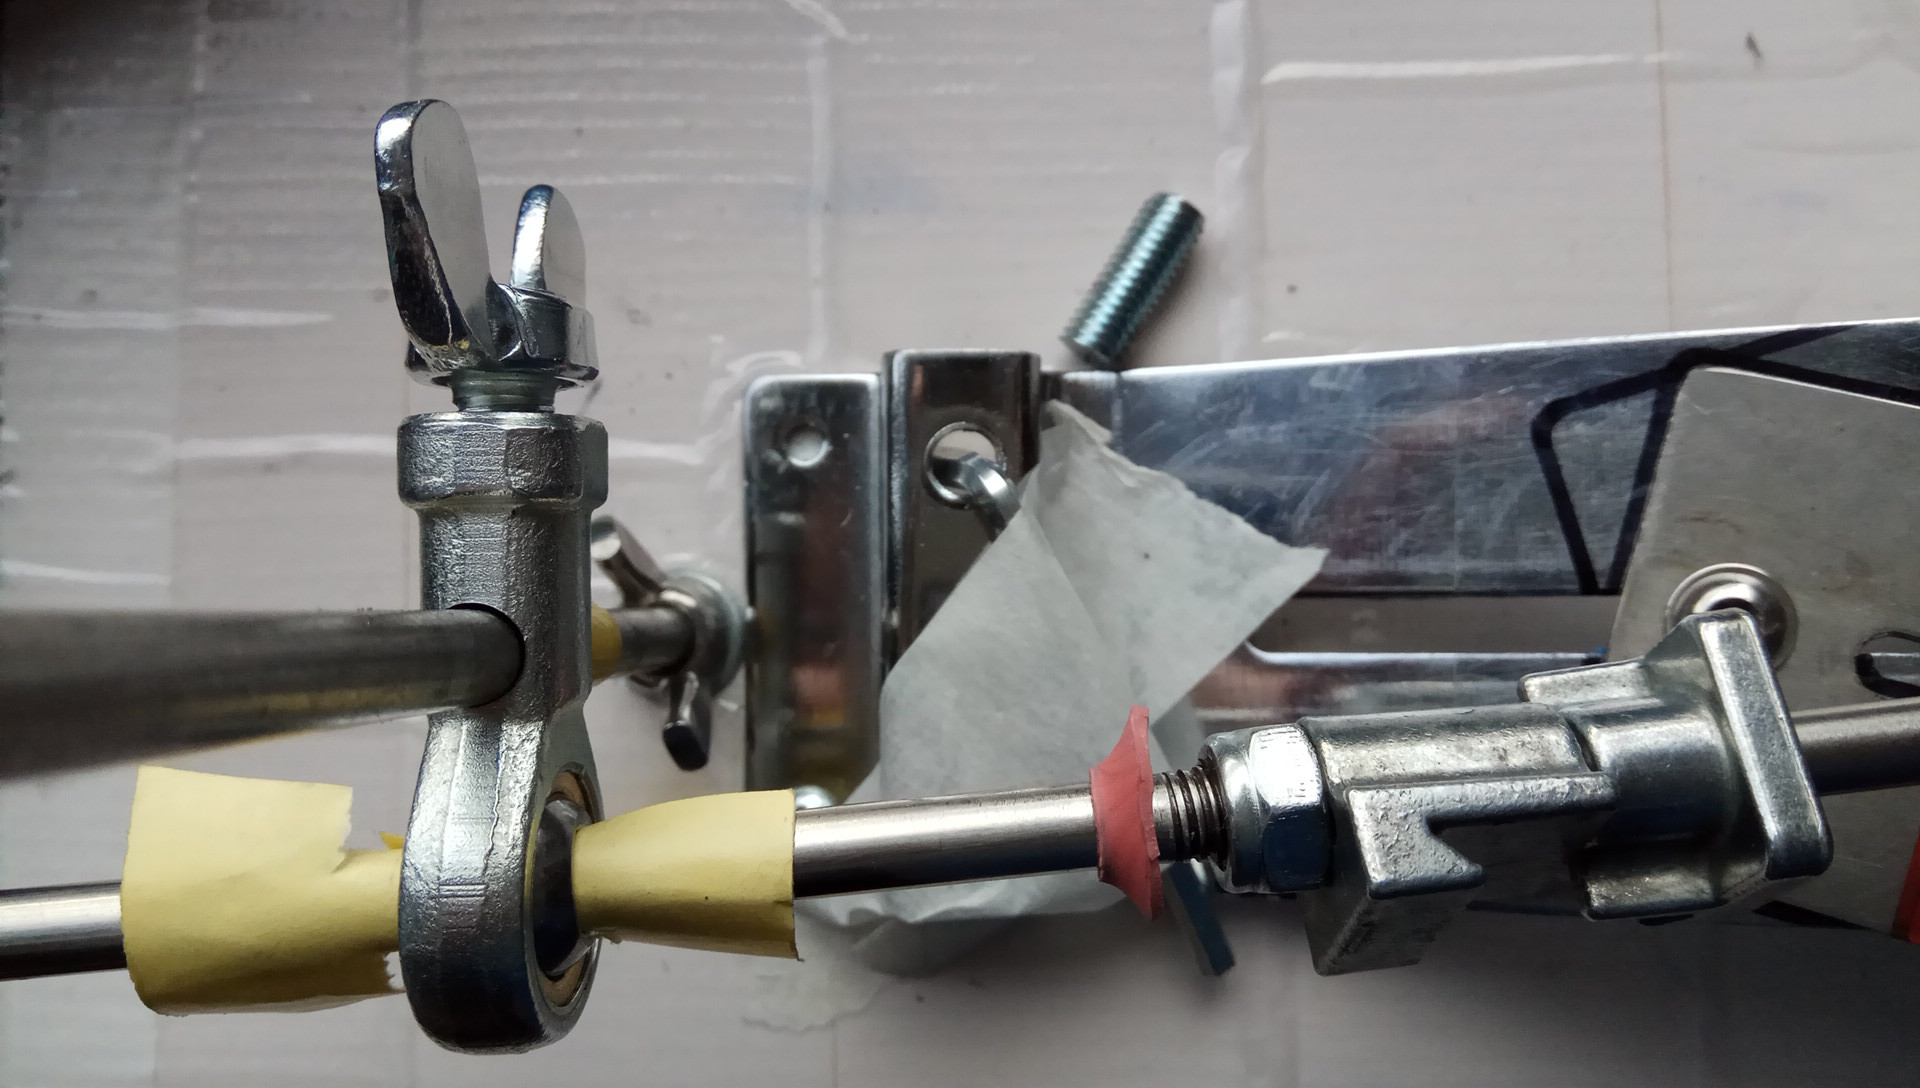
record time, everything is done and works!! today i went to a friendly workshop and they drilled out the through hole in 4 stages, the last stage being Ø7.5mm, of course. the following photo shows that the M8 female threads were cut deep (long) enough, such that the M8 screw can penetrate/protrude far enough into the through hole's region:
img_20200220_114846itkb4.jpg


the following pic shows that the distance between vertical rod and sharpening rod is the same, i.e. the new part is a perfect geometrically compatible substitute, noice:
img_20200220_1153596ik6l.jpg


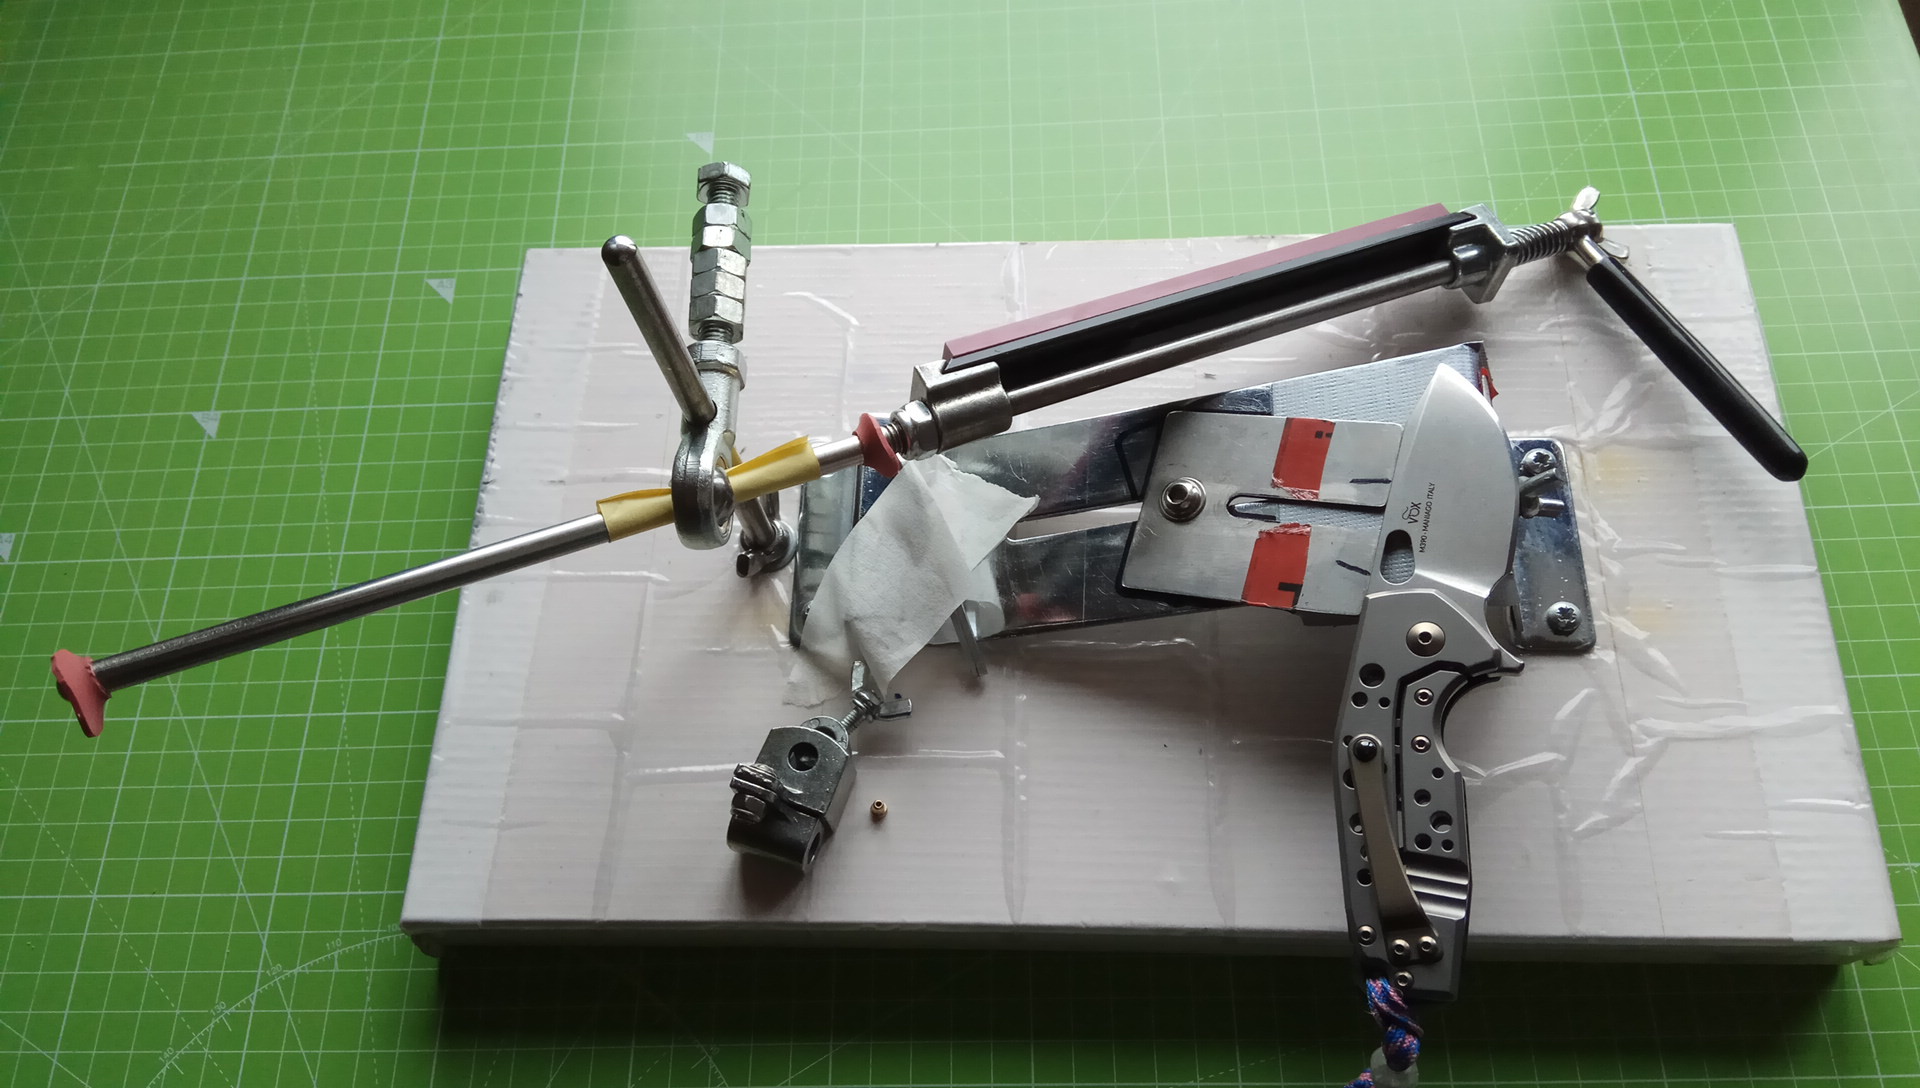
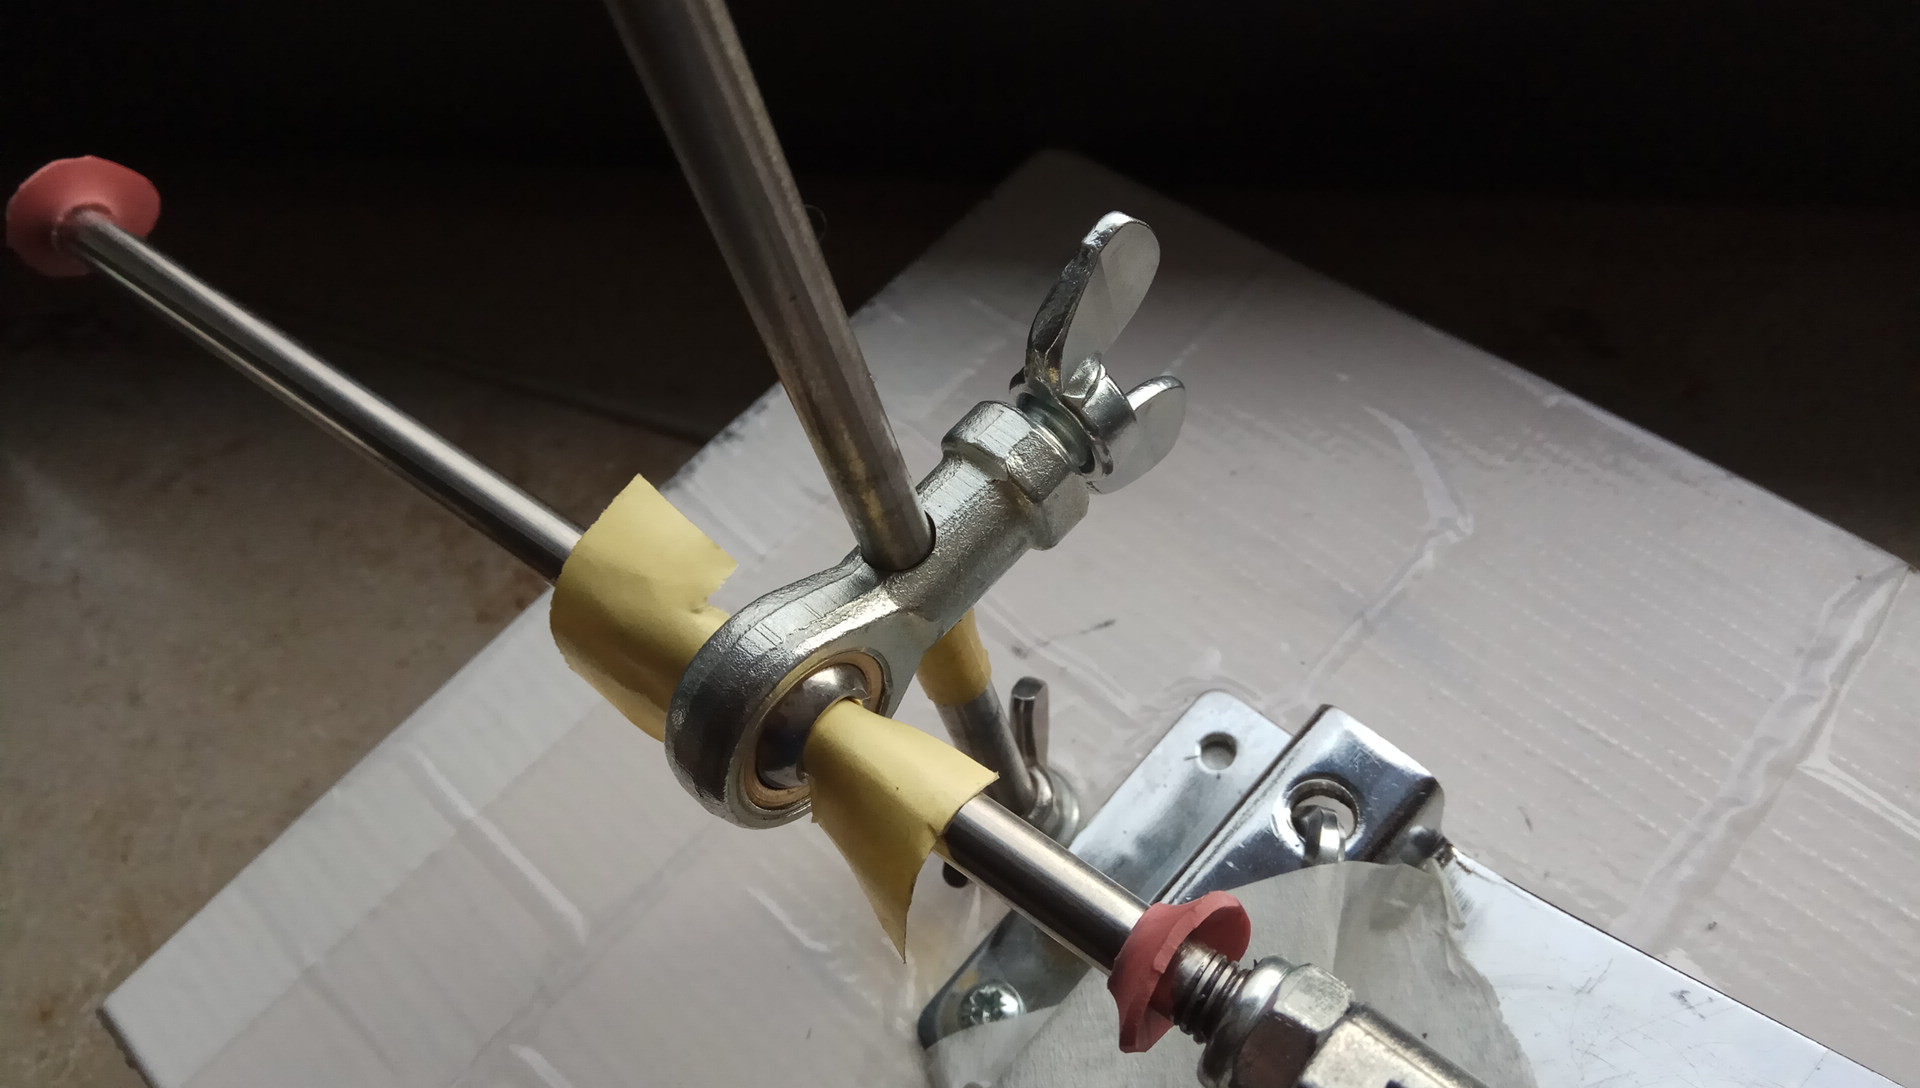
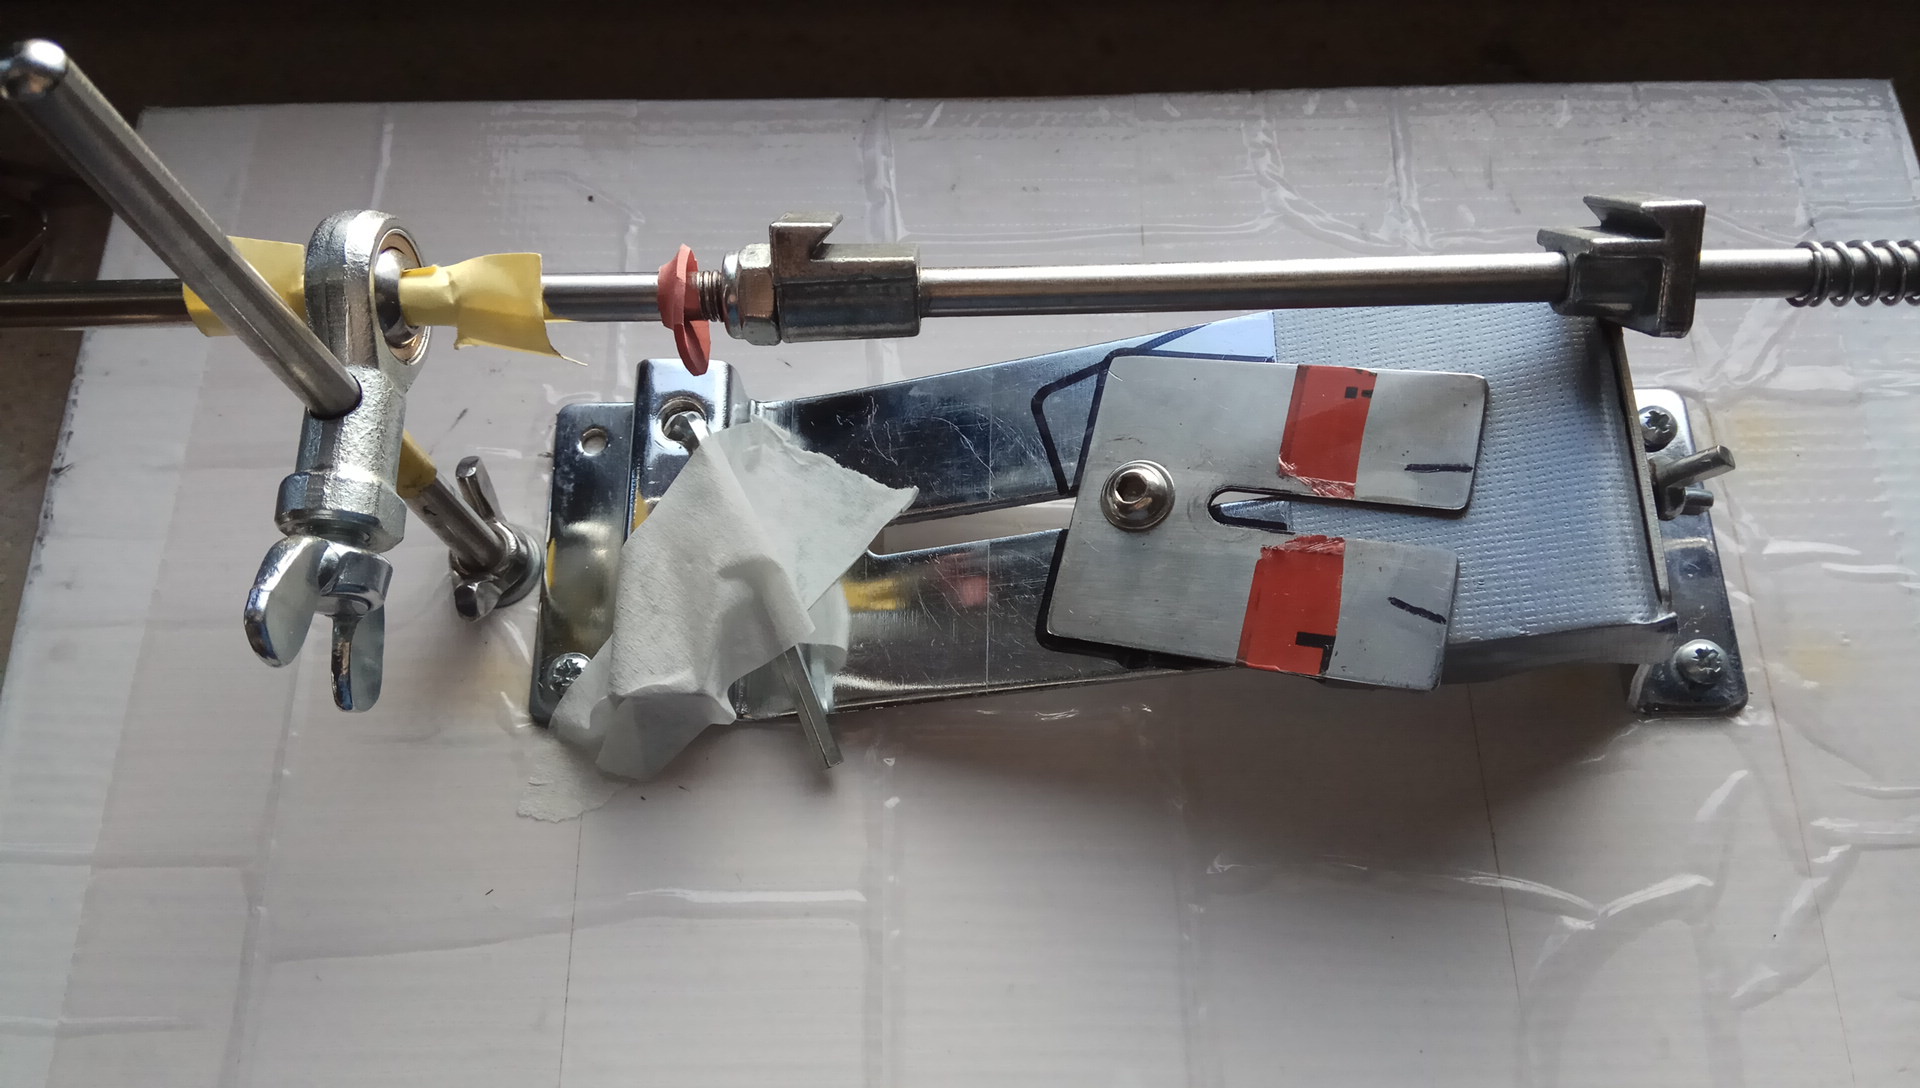
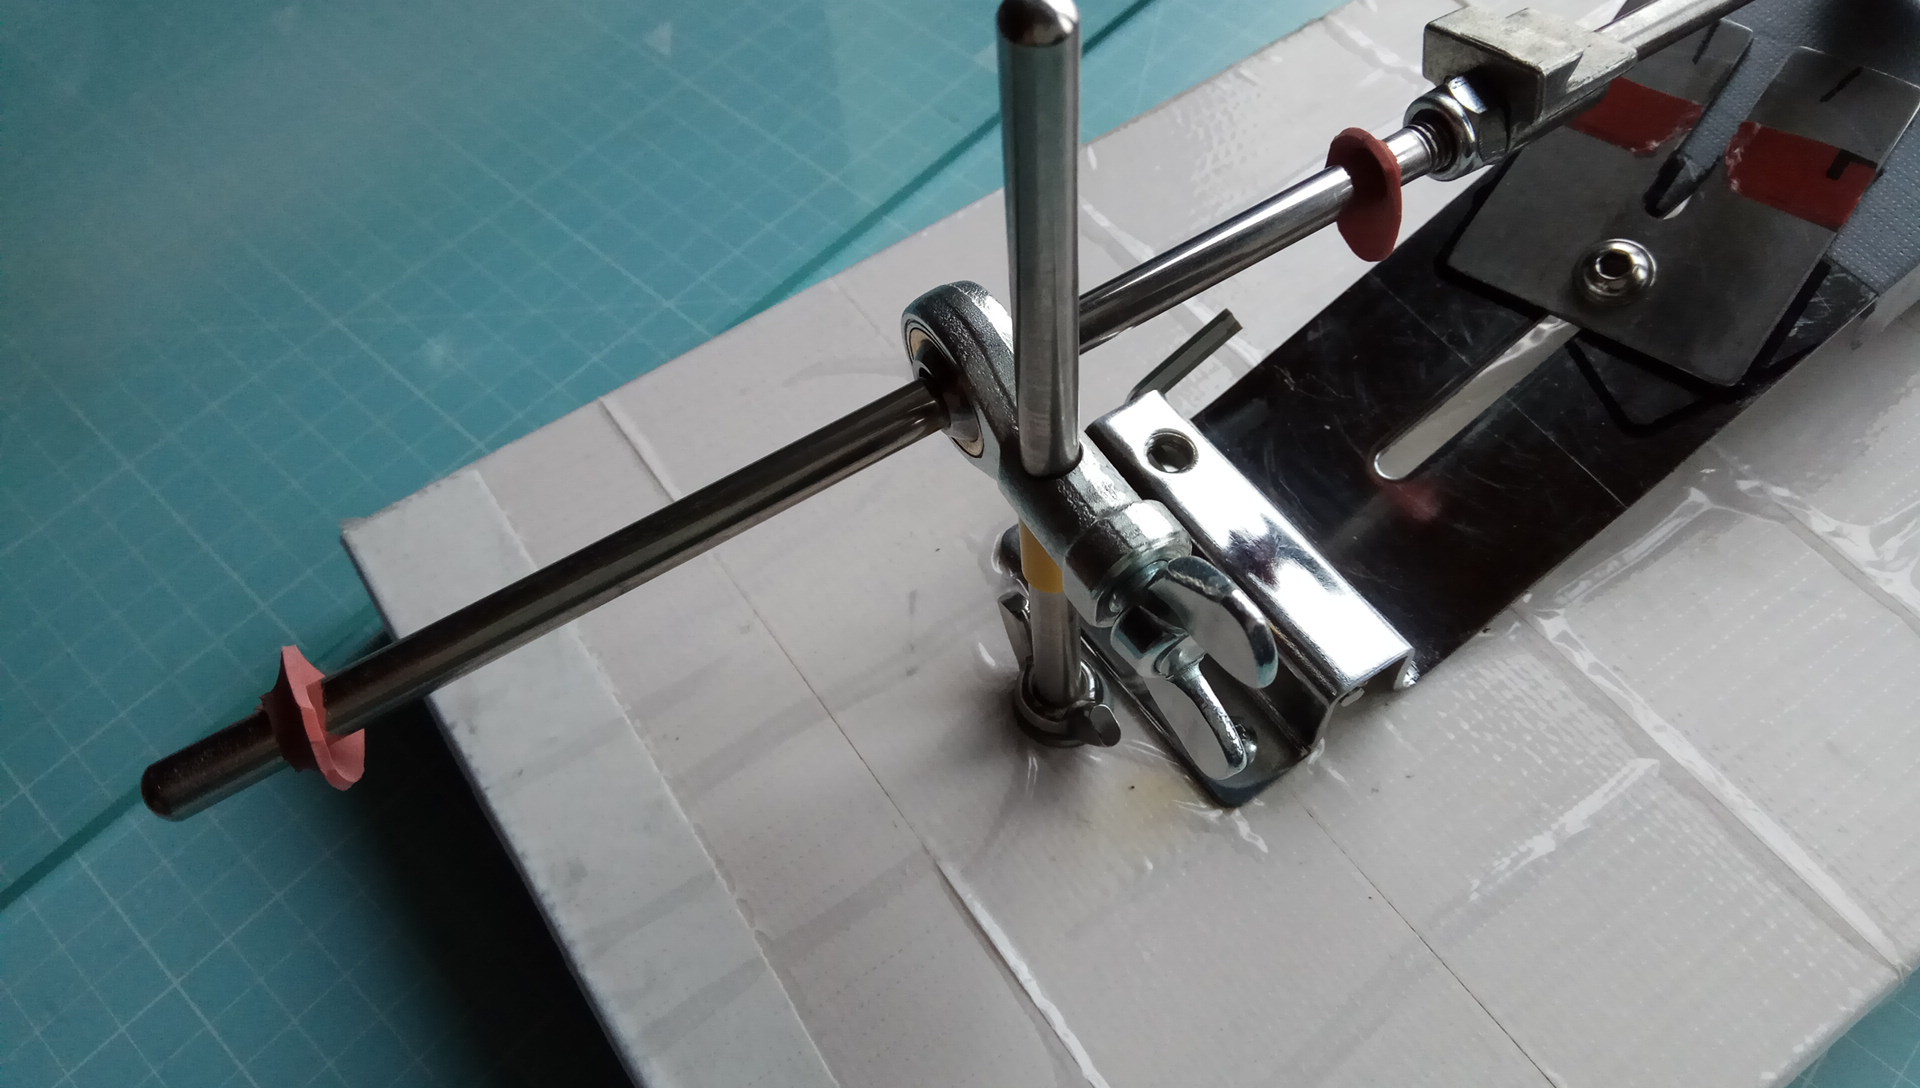
the last pic (there is so much to comment upon, read below tl;dr) shows everything put together and that it works noicely, no complaints or reservations whatsoever:
img_20200220_120542fik2c.jpg


comments:
  • do we prefer or need the new part to be in a fixed position at the vertical rod? if yes, then we are going to learn how hard it is to hand tighten the M8 wing screw so that the new part can't rotate about the vertical rod axis anymore. the original wing screw was M5 (smaller diameter, higher pressure point, higher friction force), which makes it easier to tighten the part against the vertical rod. if the point pressure by the M8 wing screw isn't high enough, then i'll try to mod the screw tip to a smaller diameter by cutting/filing/dremeling off material, no problem.
  • the yellow low-friction paper does indeed stay put and doesn't cause trouble. my idea, great stuff! actually, one wouldn't need to minimize the 1mm play because the sharpening rod is supposed to glide on the bottom area of the steel ball through hole (cf. Lansky system ;)); if the rod touches the top area during your sharpening strokes, then it means that you're applying too much pressure (or wrongly) on the whetstone. in any case, the paper serves well to reduce the steel consumption/abrasion between the two steel parts (rod vs ball).
  • it took me 2 hours to figure out the setup configuration how an extreme belly blade like the suru (i.e. small blade with small convex curvature radius) could be sharpened on this jig. i cleverly protected the black Sharpie markings of the two steel plate positions with clear tape, and i use even more black markings on plate and blade for reconfirmation of the exact blade position.
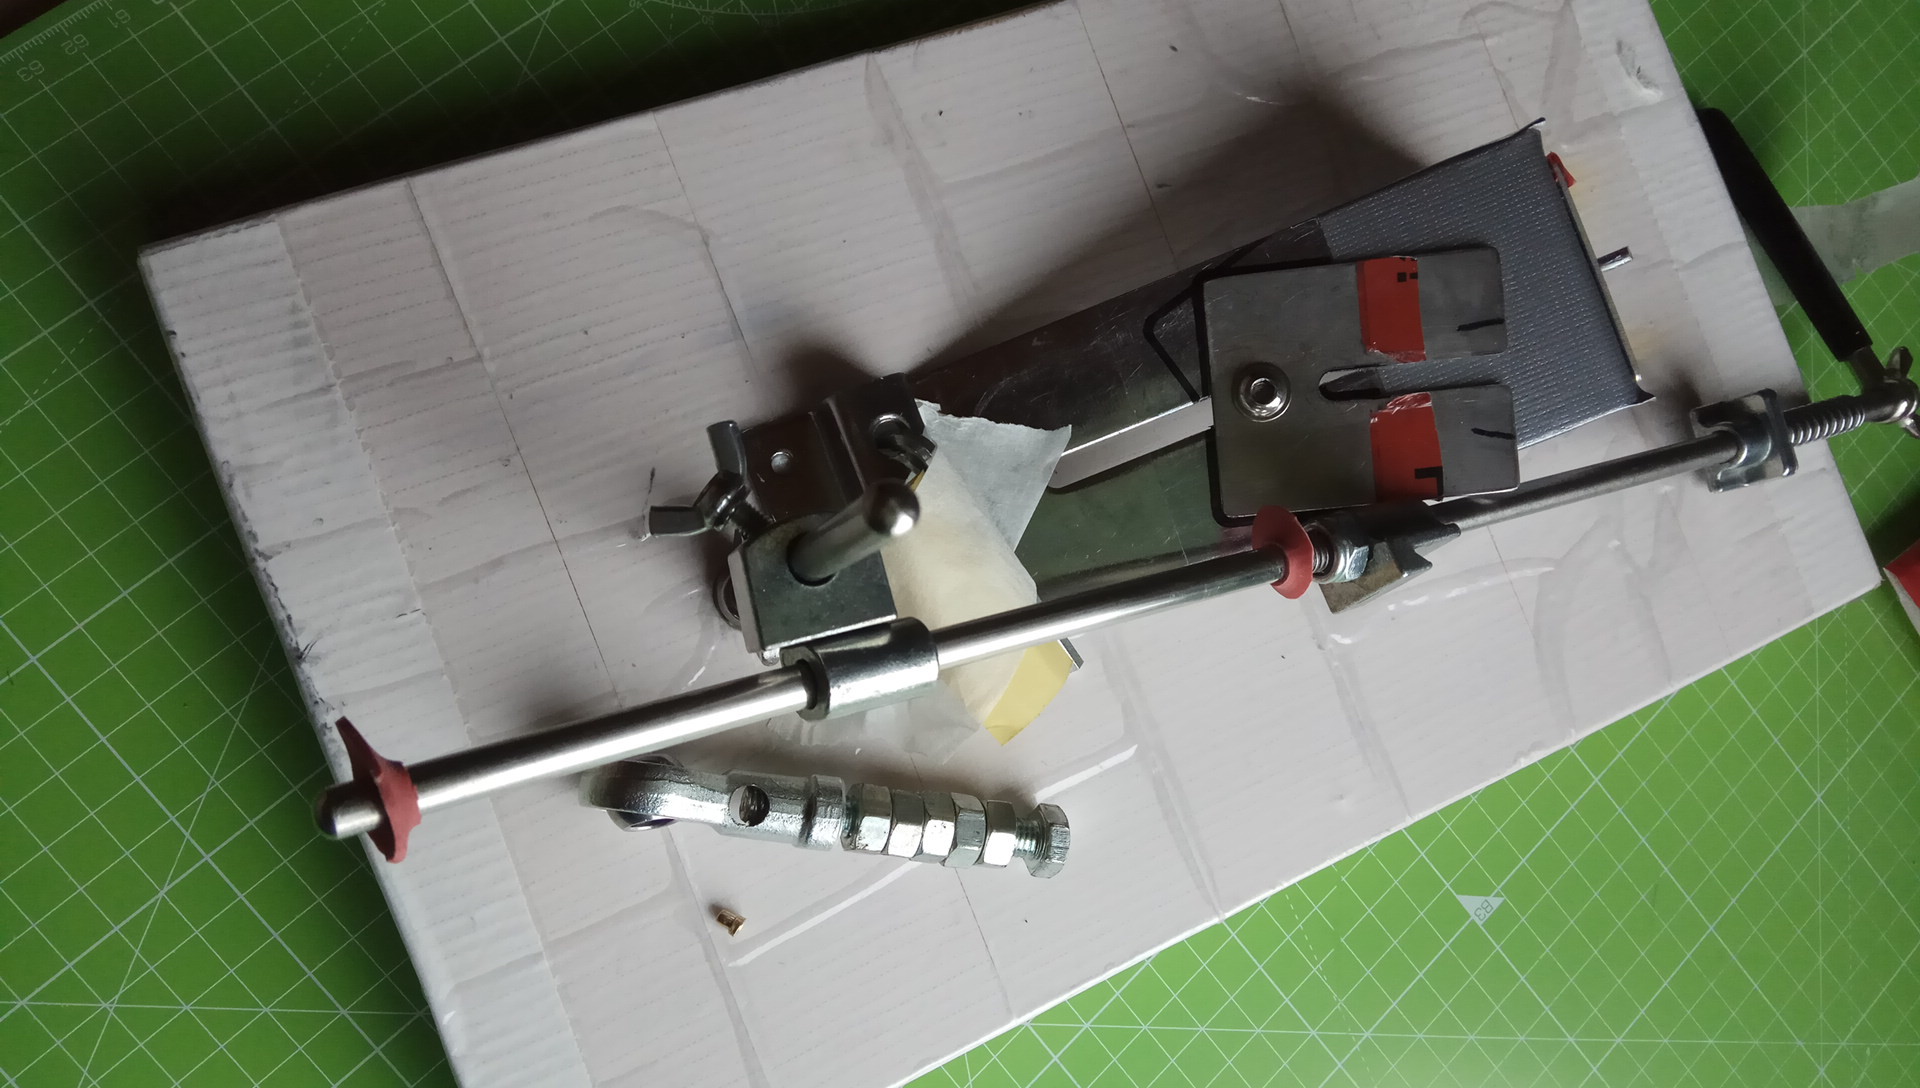
  • since my jig unit is symmetrical, switching the blade side involves "rotating" the new part by 180° (there are 2 alternative ways to do that!) and also rotating the steel plate to the opposite black marked position. therefore i keep the wrench nearby, hooked into the frame hole near the vertical rod. the white masking tape is to secure the wrench position during storage. and yes, switching blade sides on my ruixin jig is a pita :poop:
  • the height level of the new part is secured by a thick layer of electrician's tape around the vertical rod, right below the part; the part is sitting/riding on the thick brim of the tape. this way the part cannot drop/move lower in case the M8 wing screw gets loose and the part starts to rotate independently/uncontrolled about the vertical rod axis.
  • the electrian's tape, the clear tape, the black Sharpie markings everywhere, etc, yes all that takes a lot of time/efforts/energy/patience to setup precisely, and the setup is valid for 1 knife model only. fortunately the only pocket knife model i care about sharpening/maintaining on the ruixin is my cf/ti suru; while it's fun and easy to maintain the suru thru 204-freehanding, now that i managed to reprofile the bevel geometrically perfect with the ruixin and the device is all 100% ready configured to match my suru unit, it would be silly:rolleyes: not to continue using this ruixin setup for maintaining (i.e. PT stropping) my one and only EDC knife, instead of freehanding. so i'll try that from now on, we'll see how that goes.
After i gathered enough experience with the M8 wing screw and with maintaining the suru repeatedly on this unchanged ruixin-suru configuration, i'll update the thread with a report. Sharing is fun. I doht expect any surprises tho, and i can recommend already that every ruixin pro iii owner should get AND mod the 23923 part too :cool: :thumbsup:
 
Last edited:
I got some RUIXIN sharpening rods from someone. Actually 6 of them to be exact.

I don't know is it the fact I don't have the machine or fact they are narrow - but they don't give me good results.

So far I had best results with some Chinese water stones. They get my knives shaving sharp in no time.
 
hi S Smiling , yes the ruixin stones (and clone stones) are pretty narrow, in fact narrower than an EdgePro stone. I would not recommend using a ruixin stone for freehanding because they're so small and narrow that one could easily cut into the stone edges accidentally. But i do abuse the harder-bound ones (e.g. the ADAEE white stones) occasionally for some freehand grinding/filing tasks because i know what i am doing AND i don't own other stones as alternatives for those tasks.
I find it fun and somehow satisfactory to freehand abuse, consume, and get some utility out of thesee cheap cute stones, appreciate them. Reduce their number by using them up :D (you have 6, i have like 17 including duplicates):
img_20200224_181126pekqp.jpg

Using them up changes the stone height (thickness) ¡ojo! but they have minimally different thicknesses to start with, thank you china careless mass production:thumbsup:.

Anyway, these narrow stones were my very entry into freehanding. i rubbed a cheap old small kitchen knife against it, rub rub, and managed to raise a burr. that got me hooked, the rest is history ;).

Btw i never get off the ruixin device without having done 1 round of PT-stropping. Coming off the RUIXIN1500 or even the RUBY3000 the edge is still too ragged ("toothy") for my liking. Actually, the micro raggedness originates from broken off macro burrs. So you'd need to hone the apex without(!) raising a fresh micro burr. And that's done best with the PTS method with edge-trailing strokes.

I should make use of the ruixin device 24312 more often. :D
 
Last edited:
Well all I know is that I would like to get my hands on diamond sharpener too... but China shippings stopped because of the Coronavirus.

And I don't really have diamond sharpeners lying around for purchase everywhere... to make it worse my city is now having trouble with Coronavirus too...
 
but China shippings stopped because of the Coronavirus.
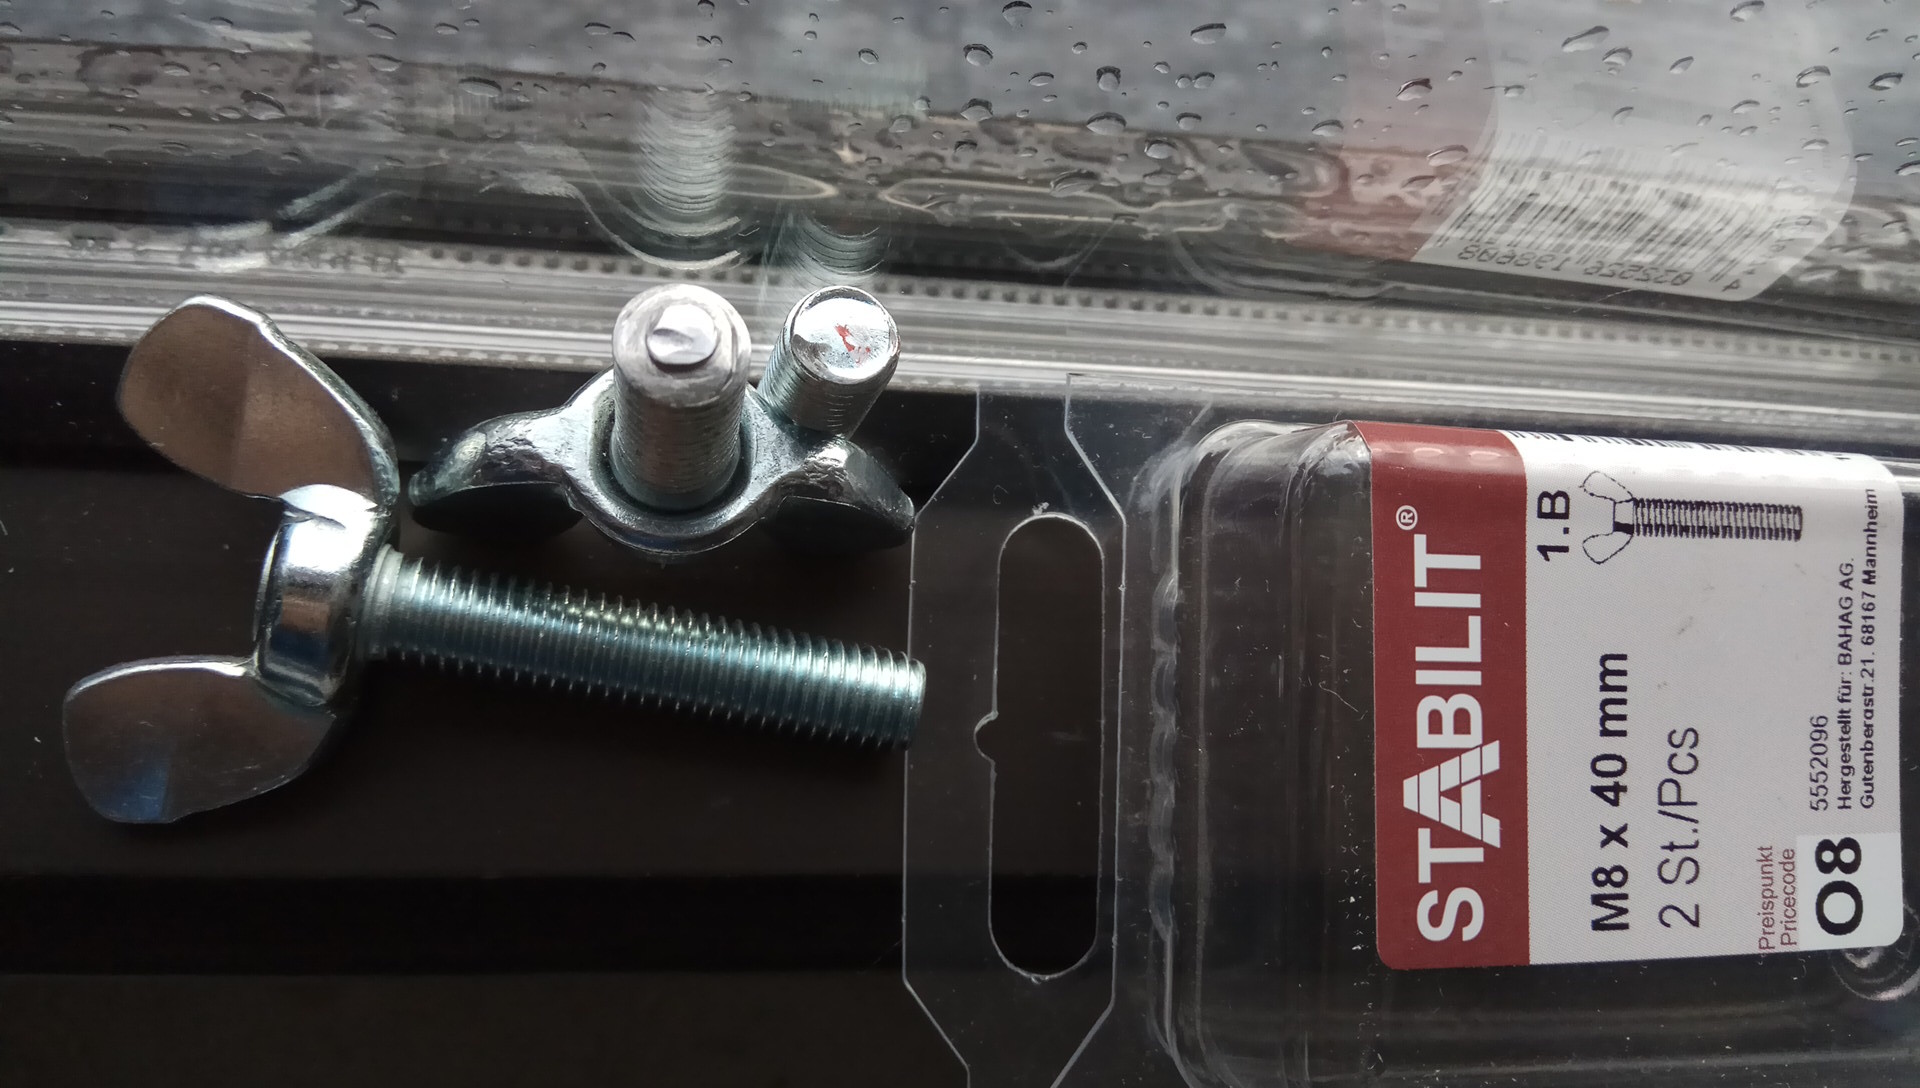
I cancelled the AliX 1$ wing screw order because the order didn't get shipped in days. Instead i went to the local BAUHAUS hardware franchise store and bought a 2pcs-pack of M8×40mm wing screws branded STABILIT (BAUHAUS's own-label afaik made in the china) for 2.9€, nice price.

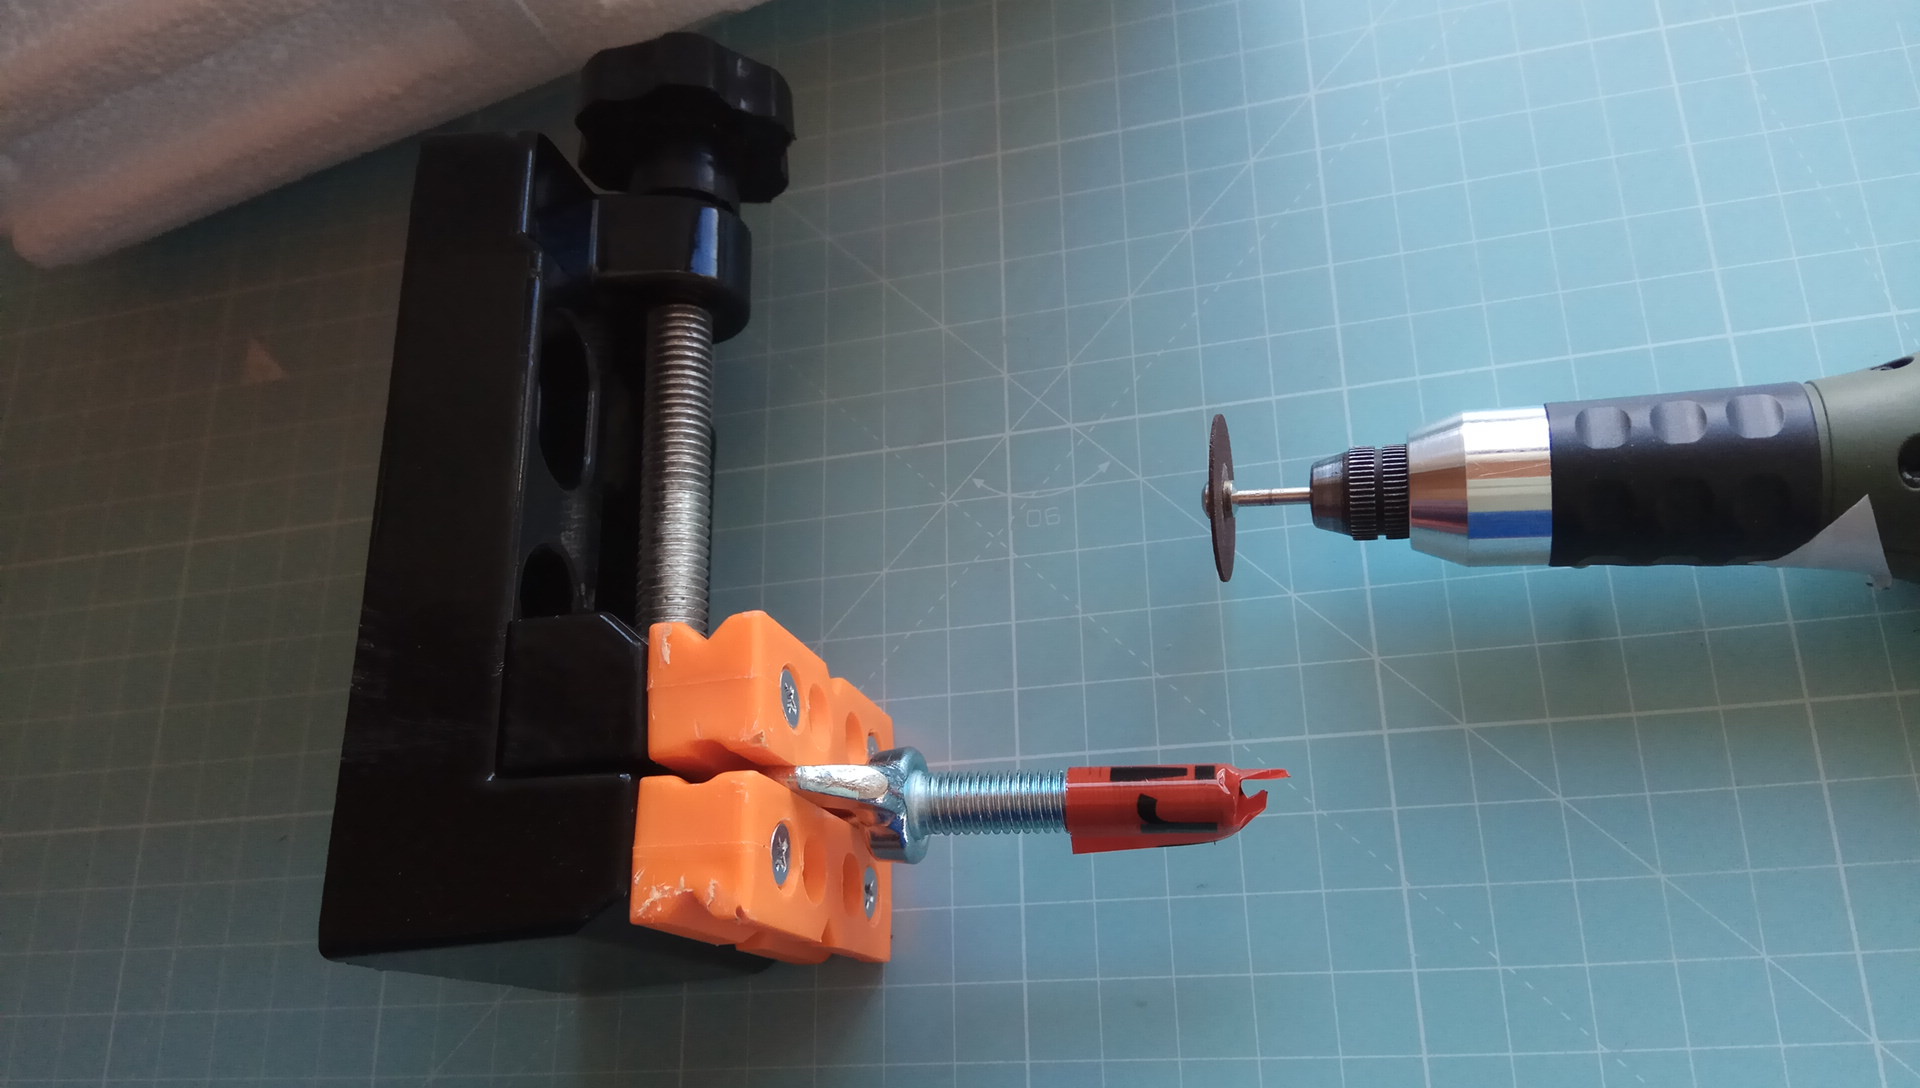
The geman dremel was my tool of choice. The 6$ mini vise helped holding the hot screw still. The minimum needed 'length' was 15.0mm, so a nominal 16mm long screw would have the perfect length. I was on the generous side when determining with my pair of calipers where to make the cut:
image-20200225_132612bxj9n.jpg


It took a while to cut through the steel. Iirc i never cut a M8 steel screw with this weakest dremel model before. Cutting the screw with a fresh bladed manual metal saw would have been faster and cleaner than that, haha:
image-20200225_13374778ktg.jpg


I was relieved to learn that the screw worked 'as is', beautifully: it was easy to manually tighten the screw and secure the part against the vertical rod, in a fixed position, with no complaints. I could have called it a day and moved on. And what a lucky dremel cut: once the screw is fully tightened, its wings happen to be oriented vertically, as preferred by me. Just beautiful, thanks :thumbsup::
img_20200225_16112113k0b.jpg


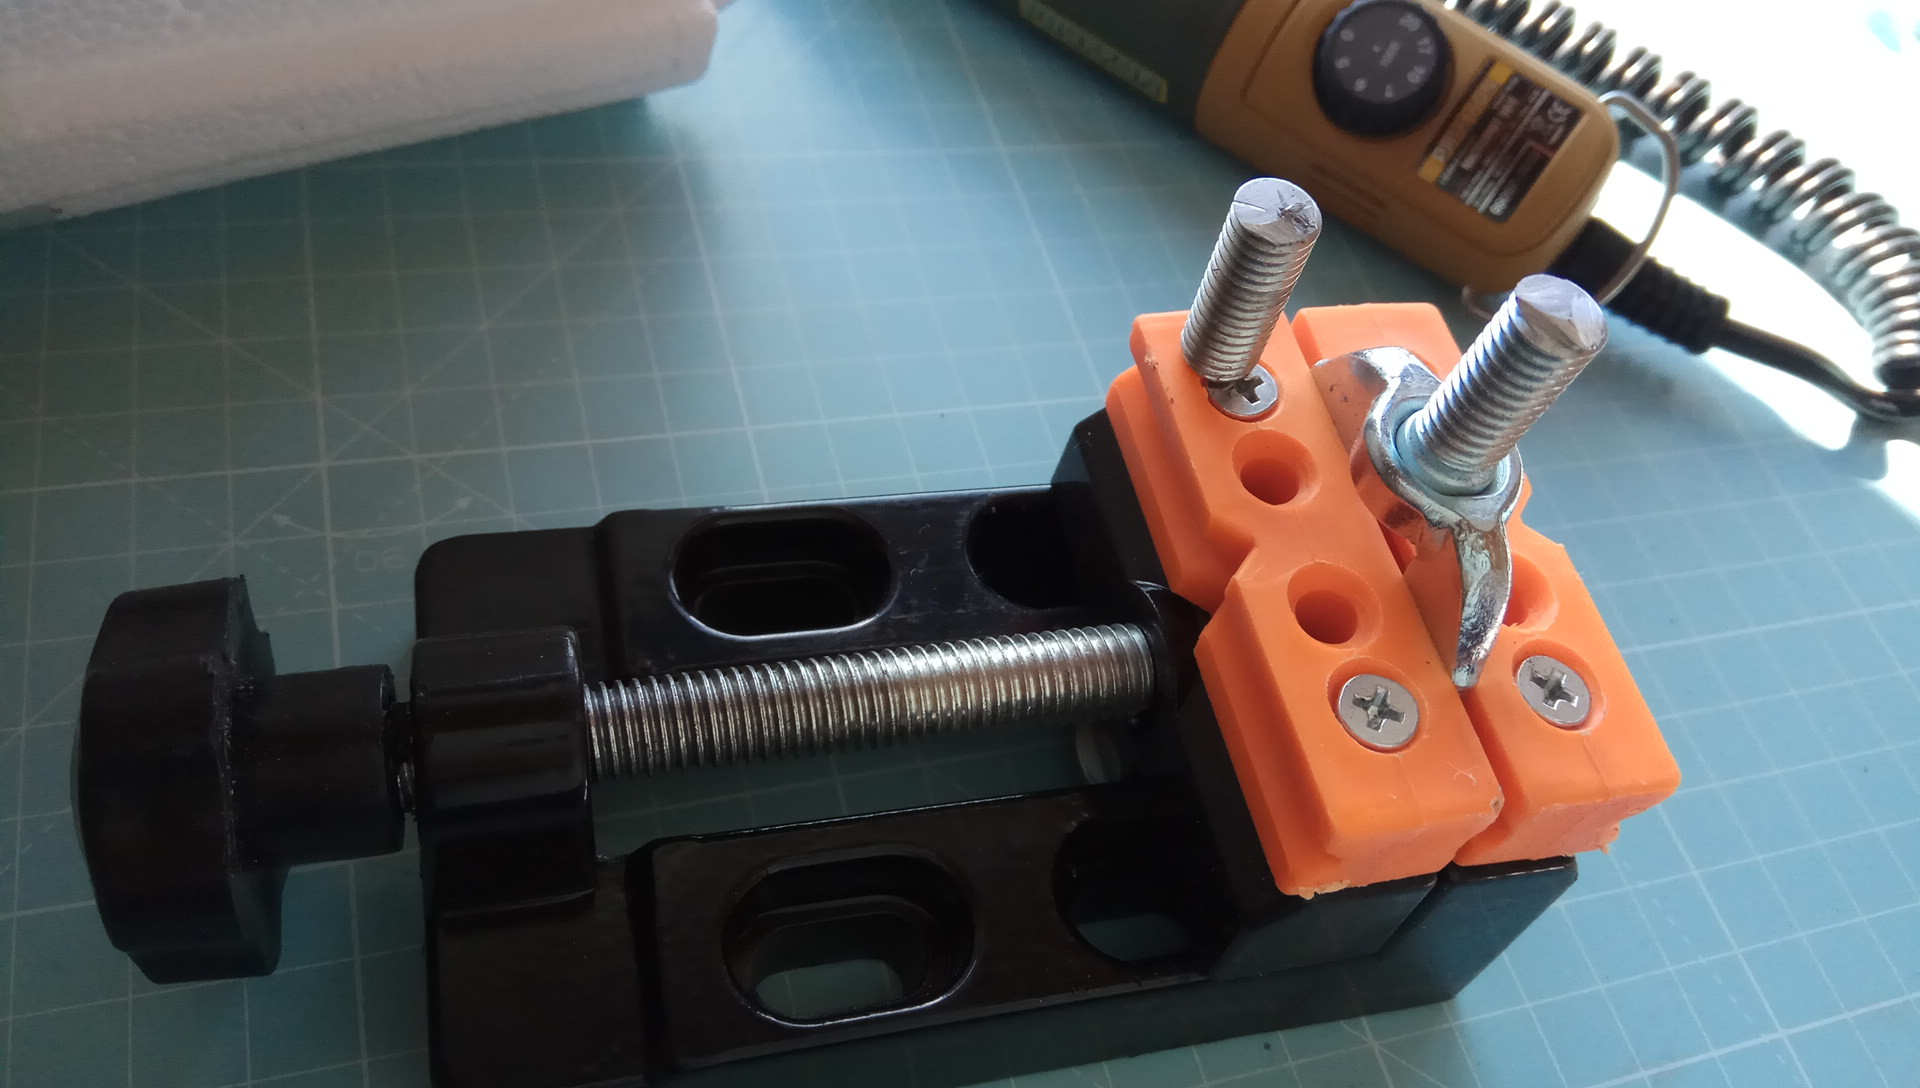
As mentioned, there was no need to mod the dremel-cut screw. I was just curious if a smaller diameter made a notable difference in the hand tightening force, so i modded the screw. Tbh i can't notice a difference, and maybe that's because the actual contacting area isn't smaller in reality. From the location, size (depth), and shape of the indentation caused by the vertical rod, one can learn a whole lot, namely the discrepancy between maths/theory and practice/reality. Look at the indentation on either screw tip:
img_20200225_161933mik2c.jpg


So modding the screw was in vain. But it looks cool: :p
img_20200225_162114kijf1.jpg


Yes, i could/should have cut off ~1.0mm more to reduce the gap in the tightened position, for esthetic reasons. But once i start shortening the screw (say with a metal file), i'd lose the guarantee that in the new tightened position the wings are again oriented vertically. So let's call it a day here and accept this gap:
img_20200225_1624072eklo.jpg


When i switch the knife blade side on this ruixin unit, i also switch the location of the sharpening rod: i loosen the M8 wing screw, take the part off the vertical rod, don't remove the sharpening rod from the part but rotate the part about the sharpening rod's axis, and re-insert the part onto the vertical rod (and depending on the knife model, i'd also have to swivel the steel plate):
img_20200225_163714ywjyv.jpg


Here you can see that i have swiveled the steel plate from 'left' to the 'right' black-marked position. Also note where i have stowed the wrench: a small magnet (sourced from a HDD) in there is holding the wrench. I test resharpened and PT-restropped my suru knife on this improved ruixin device and learned that the yellow low-friction paper is not needed to reduce the 1mm play:
img_20200226_12194596kyq.jpg


As mentioned earlier or compare with Lansky system, in the imho ideal scenario you would perform sharpening (and PT-stropping) strokes always in such a consistent way that the sharpening rod+stone is supported by the blade bevel AND by the bottom region of the steel ball through hole. Sharpening this way, the potential 1mm play doesn't pose a problem. However, your very strokes might differ from the proposed ideal scenario ymmv, and if you really need (i.e. want) "zero play" between the Ø7mm sharpening rod and the Ø8mm steel ball through hole, then it's up to you to find a workaround. The yellow low-friction paper was my spontaneous idea, you might come up with a better idea or have no alternative idea at all.:p

So why does the Lansky system have no issues with play (even though everyone can see the massive play right away)? Because the Lansky user exerts manual downward force at the center of the stone, i.e. in between the two supporting points of the rod+stone. On the ruixin it is possible, too, to manually guide the rod in such a way that the steel rod does not get to wiggle within that 1mm play area: that's what i choose to do, instead of trying to minimize the diameter difference from the get-go. Also, in practice, sometimes having play at your disposal does come in handy, is welcome (or even needed).

Actually the part assembly including drilled hole is directly available from AX (e.g. AX-item "1005002393008925") but it's for the Ruixin PRO RX008, compare the millimeters:
h820dc8a2eb194c7ca023szkwy.jpg


In any case, imho this new 1.6$ part is a tangible improvement to my previous ruixin pro iii custom setup, and the ruixin manufacturer should substitute the new part for the hilarious original 24511 swivel hinge in ruixin pro iii production units from now on. :cool:
 
Last edited:
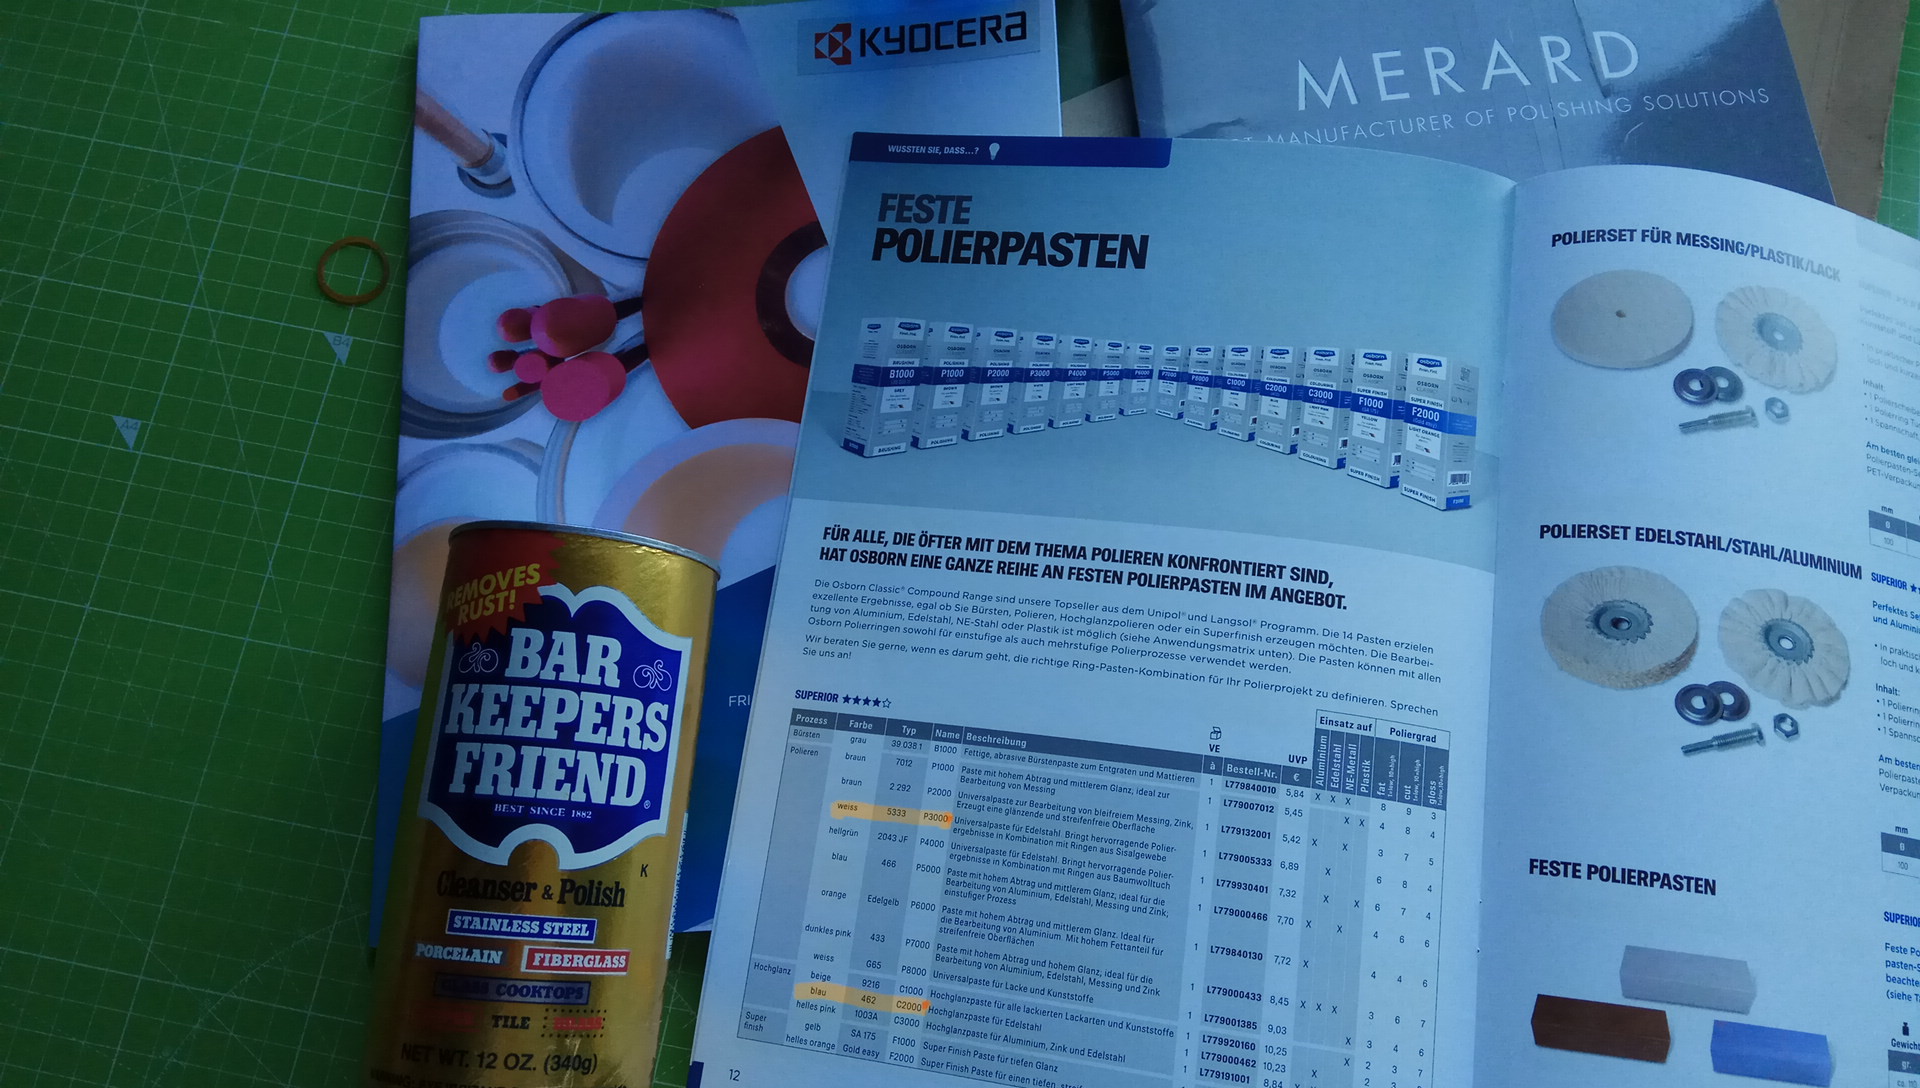
salu-le :cool:, yes tl;dr the thread has become too long to find where i mentioned a specific detail, np. so here we go again, i use the WHITE/BLUE-compound set distributed by the geman trading company "kwb" (amazon gemani ASIN: B001B4WYYE), sku "4854-20". it is manufactured in gemani in the polishing compound manufacturing site of OSBORN.COM which is a multinational concern. they are also the manufacturer of the DIALUX polishing compound brand which can be easily sourced on ebay. the manufacturer's original SKU for the blue compound is "C2000" and for the white compound is "P3000", i talked with the factory and they gave me that info:

img_20200514_083831_fkrjty.jpg


a french friend also provided me with French polishing paste made by MERARD.COM . they are the maker of the hard-to-find LUXOR brand. i got my hands on 2 white compounds and 2 orange compounds, and they are stellar too and not (much) more expensive.

since i have plenty of experience with these 6 compounds, i can tell you that it doesn't really make a difference OSBORN vs MERARD, feel free to get any which is more available to you, or less expensive. the OSBORN-made compounds (for industrial, or workshop use) can be found more easily in our country, in various hardware stores, either original OSBORN-branded or distributed by 29934 tool trading companies like kwb.

I am a big fan of MERARD compounds though, they're exotic in gemani (only jewellery shops get their hands on that stuff easily), not common .. which makes me feel superior owning a selection.:D
 
My Ruixin Pro Style 12 got here a few days ago. I ordered it to check it out while I wait for WE to get the Pro Pak III's back in stock. Not sure when that might happen...
It is difficult to lock down small pocket knife blades and not have the stones scraping the steel locking piece. It would be better if they didn't roll the corner where the blade sits and just had a sharp corner. But it works great for scissors! I sharpened up two pairs of scissors last night and they are sharp and cut great. I took them up to 1500. I didn't see much point to go any higher than that. Alas, I totally forgot to take some photos, which is very uncharacteristic for me. o_O
 
salu-le :cool:, yes tl;dr the thread has become too long to find where i mentioned a specific detail, np. so here we go again, i use the WHITE/BLUE-compound set distributed by the geman trading company "kwb" (amazon gemani ASIN: B001B4WYYE), sku "4854-20".
Hi ! Thank you for that quick & detailled answer ! They are out of stock in amzn.fr and temporary out of stock in amzn.de :(
Add the fact that shipping from Germany double the price for this item, I'm wondering if I should consider buying one Puma green for the price...
Yes, I bumped on Merard's products but aren't that easy to find !o_O
 
one Puma green for the price...
Yes, I bumped on Merard's products but aren't that easy to find !o_O
puma was rated soso on Leo's website
http://messer-machen.de/schaerfmitt...ratentfernung/bestenliste-gratentfernung.html
yeah shipping costs ruin the deal. you could try ebay and look for LUXOR or DIALUX compounds. costs a bit more than my el cheapo KWB stuff. green compound will work too since the PTS method is so effective at making the "paste" work.

get any compound. whatever is inexpensive and available. green is actually finer than my BLUE.
 
Last edited:
Back
Top