A couple of small tips:
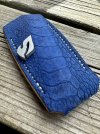
I've often mentioned that on larger projects I use a conditioner as a finish and I thought I'd show you how I go about it. My conditioner of preference for this use is Oakwood from Australia. It leaves a very nice finish. Pretty good conditioner too, although for deep conditioning I do prefer Skidmore's. Both are available on the big river. The scabbard was oiled after stitching and allowed to set overnight until the oil was pretty uniform. Then I apply the conditioner as a finish. This deal is for smoothout only items by the way.
I like to apply the conditioner with an old t shirt stretched tight over a couple of fingers.
I put it on fairly heavy and quickly.
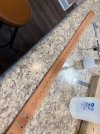
Once the project is covered, I'll take an old toothbrush and brush out the excess conditioner from the stitching and any tooling:
I find this important. As soon as I've brushed out the excess conditioner, I wipe down the whole project with a couple of paper towels, taking off any excess conditioner from the surface of the project. Don't let it sit around with excess conditioner on it. It can cake up and dry on there. Ya'll be able to buff it off but ya probably wish ya hadn't let it sit around like that in the first place. Ask me how I know. It's just easier to put it on, brush off stitches and tooling and wipe down the whole project before the conditioner starts to dry.
If weather allows after wiping down I'll set er in the sun. I actually set a timer for 15-20 minutes and then will flip the project over. UV light can darken the leather and so I'll let each side have bout the same amount of sun tanning. This of course also drys the conditioner and then I just buff it out with a crumpled up paper towel. You're done. I will put BagKote on the edges after this but not on the surface. The Oak wood dries and buffs to a very nice uniform shine.
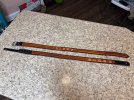
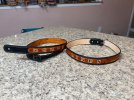
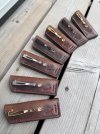
This is a different scabbard but was treated the same way:
I had pics of our subject scabbard when it was done. Hauled er done to this shed that I use as a back drop for these pics. Took the pics, came back up to the house with the scabbard, package it up and shipped to the customer. Later that evening came to check the pics on the computer and none of them had come out. The camera settings had been changed somehow and not a single pic of that scabbard, finished came out. And it be gone. So we substituted the next smoothout one I did just a week or so later. Anyhoo there it is.
Second tip:
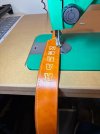
So you are going to cut a border on a belt or on any item near the edge where you can use your fingers on the edge to help maintain consistency. Do this enough and it feels like you are getting cut from running your fingers down that sharp edge on the belt. If you've done it ya know what I mean.
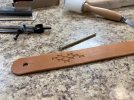
That edge is pretty darn sharp as you can see above. Simple answer take the minute or two and round it off. I have a size #0 edger that I use on this. Literally it takes a minute to do both sides of the belt. The #0 takes so little off that it doesn't interfere with your edging of the belt later when its mostly finished.
A lot more comfortable running your fingers down this now slightly rounded edge.
Giver er a try. Way more comfortable.


